5 Essentials That You Need To Know About RV Awning Care

RV awning care is important because awnings make RV living so much more pleasant and enjoyable.

In fact, they can serve many useful functions. They can extend our living space, help cool our RV in summer,and protect things like bicycles and grills.

Besides all that, they also provide a comfortable shelter from direct sun and light rain.

So with all that awnings accomplish, it makes sense to practice some simple RV awning care procedures to extend the life and usefulness of our awning.

This article will discuss 5 ways to maintain and improve the use of an RV awning.

Watch my video about RV awning care

Disclosure: Please note this post may contain affiliate links. This means – at no additional cost to you – I earn a commission if you make a purchase using our affiliate links. I only link to products and companies I use and feel comfortable recommending. The income goes toward supporting the free content on this website

Table of Contents

1 – Cleaning Is Part Of RV Awning Care

A lot of RVers never even think about cleaning the awning material on their RV. But regular cleaning extends the life of an awning considerably.

Most RV awning materials are made of either acrylic or vinyl. And you can use a dedicated RV awning cleaner on either of them.

Vinyl awnings are more robust and can handle a wider variety of cleaning solutions well. But acrylic awnings call for using the right kind of cleaner to avoid stripping the water-resistant coating away.

The cleaning process is actually pretty simple too. While the awning is out, spray the cleaning solution on both sides of the awning material.

When it is fully covered with solution, roll the awning back up against the RV and let it sit for 15 minutes or so. This allows the cleaning solution to thoroughly get absorbed into all parts of the awning material.

Then open the awning again and thoroughly rinse with water. After that allow it to dry completely before rolling it back up again.

If this is done twice a year, it usually keeps the awning material looking good and generally clean.

Click here for RV awning cleaner

2 – Never Leave An RV Awning Out In Strong Winds

In calm weather an awning functions well and poses no problem. But when high winds start to kick up, it’s time to get that awning back into its storage position.

This is because an awning can become like a huge sail in high winds and it’s easy to experience damage at that point.

Sometimes it just rips the awning material itself, but other times it can even damage the awning frame too.

At any rate, any of this kind of damage is expensive to repair. So it’s best to just avoid the issue completely and take in the awning when winds are strong.

How strong should the wind get before you take it in? That’s difficult to say, but just know that even wind speeds of 15 miles per hour can do damage. And above that speed, the chances of wind damage gets far greater.

So if you plan on leaving your RV for a while, it’s a good practice to think about pulling in the awning while you are gone.

This is because weather can change suddenly and abruptly. So bear that in mind as you decide whether to leave the awning out or not while you are away.

One more tip – always leave one side of the awning lower than the other side when it rains.

This makes sure that the rain water will have a clear path to drop off and not just pool on the awning material. Pooling water can rip an awning easily.

3 – RV Awning Care Can Include Using Tie-Downs

Some RV awnings have better support frames than others. So therefore, some awnings can stand up to more wind speed than others.

In either case, it’s not a bad idea to provide a little extra insurance against wind damage by using tie-downs. They can help provide more strength and stability while the awning is deployed.

They are also very easy to use and don’t take much time to setup and remove.

I often see RV awning stabilizers installed with the tension strap in front of the awning. But I have found that they can work almost just as well if the tie-down stake is placed back toward the RV too.

RV awning tie-downs with the stake installed in front of the awning.
RV awning tie-downs with the stake in front of the awning
Awning tie-downs where the stake is installed in the ground by the RV itself.
RV awning tie-downs with the stake back by the RV

And in most cases, it will be best to use a ground stake that screws into the ground to anchor the tension strap. This kind of stake is much harder to pull up and so is more reliable.

Click here for an awning tie-down kit

Click here for corkscrew awning stakes

4 – Use RV Awning Deflappers

If wind conditions start to get active, you may notice that the awning material starts to flap in the wind. This is especially true of acrylic awnings.

The sound that a flapping awning makes is irritating for sure. But there is also danger of damage being done by this kind of flapping as well.

Over time, the flapping motion can slowly weaken the edges of the awning and cause them to fray. And it also can eventually have a negative effect on other parts of the awning.

So, it’s part of good RV awning care to install awning deflappers that stretches the awning material and holds it in place.

They also go on easily and quickly, so it’s a simple process. And they can be removed in just a few minutes too.

Click here for RV awning deflappers

5 – Extend Awning Protection With A Sun Shade

Part of RV awning care is getting the most use of your awning. And since one of the main advantages of an RV awning is the shade it provides, just extend that shade further.

You can do that with a sun shade that will extend the shady area of the awning farther toward the ground. But it also continues to allow easy visibility through the shade material.

In addition to the added shade, it can also provide a greater measure of privacy if you are too close to your campground neighbor.

These kind of sun shades are also easy to attach to your RV awning. They have a strip that goes into an open rail that is found in most awning bars.

The strip holds the sun shade to the awning firmly. From there most sun shades have grommets that can be used to tie the bottom of the shade to the ground with stakes.

Many RVers use bungee cords to hold down the bottom of their awning shade. And they work well for this purpose.

An awning sun shade tied to stakes using bungee cords
RV awning sun shade tied to stakes using bungee cords

Once the sun shade is attached to your awning, you are shielded from much of the sun on that side of the RV. It can make the difference between enjoying your awning in comfort or leaving to go back inside.

There are even sun shades that can fit on the ends of the awning too. And of course, these can increase both shade and privacy when in use.

Click here for awning sun shades

Click here for awning end cap sun shades

Conclusion

Just adding a few ideas and procedures to your RV awning care plan can be very beneficial. It can save you lots of money on awning repairs and extend the usefulness of your awning too.

The 5 tips presented in this article are simple and easy to do. And putting them into practice will improve your RV living experience.

Have safe and happy travels my friends!
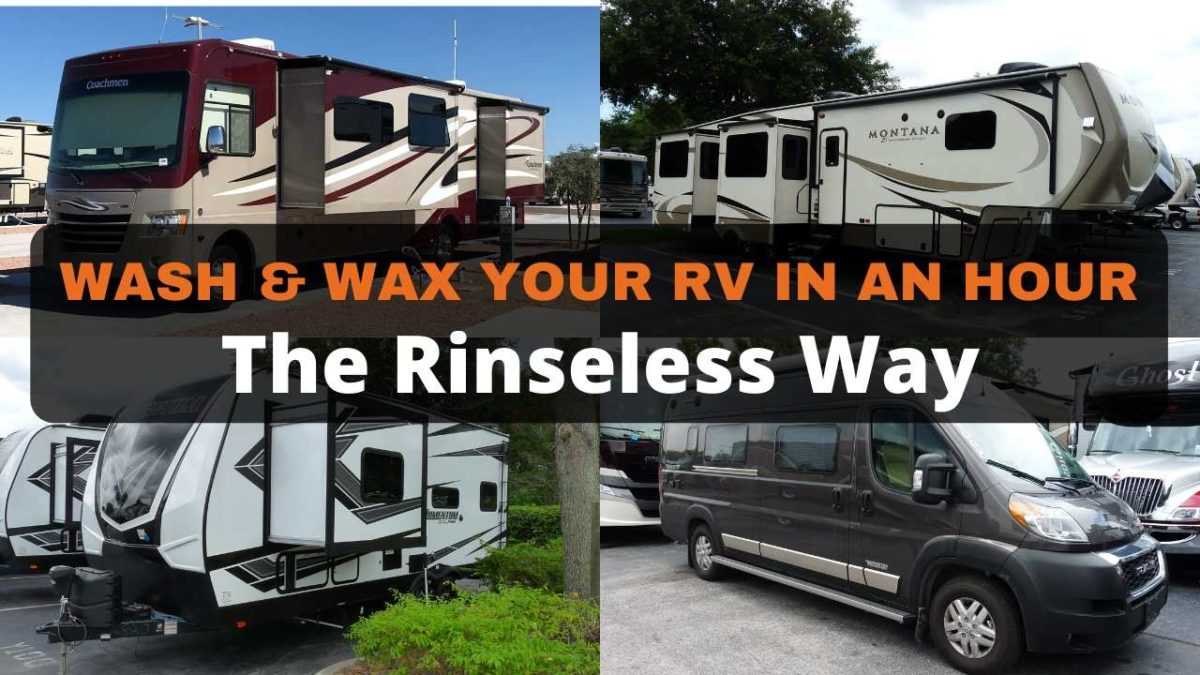
RV Wash And Wax In An Hour – The Rinseless Way

Yes, you can wash and wax your RV in an hour or even less!

In an earlier blog post I explained how washing and waxing an RV is possible using no water, no buckets and no ladders. Here is that article to read.

But some RVers have a hard time accepting that waterless RV washing is safe. They feel that they must be scratching the exterior surface of the RV.

Of course, if you follow the directions in that article, no damage will be done to your paint, gel coat or fiberglass surface.

But in this article I will show you a different way of accomplishing the same thing, this time using SOME water.

I’ll show you how using about 3 – 4 gallons of water on a typical RV will do the job just fine. It will both clean and wax your RV and best of all it’s really easy and fast!

Watch my video about how to wash and wax your RV the rinseless way

So let’s get started!

Disclosure: Please note this post may contain affiliate links. This means – at no additional cost to you – I earn a commission if you make a purchase using our affiliate links. I only link to products and companies I use and feel comfortable recommending. The income goes toward supporting the free content on this website

Table of Contents

What Is An RV Rinseless Wash?

Rinseless washing has been in use for autos and trucks for some time now. But for some reason RV owners have just not picked up on it yet.

An RV rinseless wash is possible because of advanced cleaning products on the market these days. These products have lubricating polymers that surround the dirt and grime and lift it slightly off the surface.

Then using a high quality microfiber towel or mop, you can wipe off the residue left by the cleaning solution. And since wax is part of the solution too, you can leave a nice coat of protective wax behind.

It is called “rinseless” because there is no need to use a water hose to rinse the surface after application.

The product that I have used for quite a while is made by Optimum Polymer Technologies. It is called Optimum No Rinse (ONR) Wash & Wax.

Many professional detailers use this product on even high-end vehicles. And it is completely safe for any auto exterior surface if used correctly.

Using this product you can quickly and easily perform an RV wash and wax that will leave your RV clean and shining like a diamond!

RV Wash And Wax Tools Needed

To wash and wax your RV you will need only one bucket. And a two gallon bucket will do just fine.

You only use an ounce of ONR in a two gallon bucket, so it’s very economical to use. And usually only two buckets of product are needed for me to wash and wax my 40 foot diesel pusher.

After you have your cleaning solution ready, you will need a very soft bristle application brush.

And it should be placed on a telescoping pole that will allow you to reach the top of the RV sides.

You just dip the brush in the solution, and then apply it to the RV. Don’t scrub or rub hard. Just a gentle application will suffice.

Once you have covered an area with ONR, you then remove the residue with high quality mop heads on a telescoping pole.

And the pole system I like to use for this is made by Aero Cosmetics. The pole easily adjusts to any height for an RV. And the head swivels to match curvy RV contours.

But most importantly, the mop heads are made of high quality materials that will allow you to perform a rinseless wash without surface damage.

There are links to all of these tools listed below here.

Optimum No Rinse Wash And Wax

Soft Wash Brush With Telescoping Handle

Aero Cosmetics Wash Wax All Mop And Telescoping Handle Kit

(These are affiliate links for the product on Amazon. It does not cost you any extra to buy the product using my affiliate link if you choose to do so)

How Often To Wash And Wax Your RV?

Since it only takes me about an hour to perform an RV wash and wax on my RV, I tend to do it fairly often.

I know that many RV owners don’t wash and wax their RV very often. This is because they use the old methods that are very difficult and time consuming.

And don’t we all have a tendency to put off the chores that we don’t like doing very much?

Or it could be because they tend to use professional detailers instead. These professionals do a great job, but they also charge hundreds of dollars each time.

So RV owners often use them only once or twice a year. But this is not enough in most cases. Would you feel good about only washing your car or truck once or twice a year?

The system I am showing you in this article does require an initial investment in the pole system and tools needed. But from there on the cost is minimal.

As a result, I often wash and wax my RV about once a month. I like to always have plenty of wax protection on my coach so it constantly looks great.

I also tend to alternate between a waterless wash using Aero Cosmetics Wash Wax All product and a rinseless wash with ONR.

You don’t have to do it this way though. It’s just a routine that I have adopted on my RV.

Either product will do a great job on your RV’s exterior!

Extend The UV Protection On Your RV

The wax contained in either Wash Wax All waterless wash or ONR rinseless wash is good. But it only lasts for a couple of months or so.

However, your RV will probably be exposed to the sun’s UV rays constantly if it is in use a lot. And UV damage is one of the worst factors that can harm an RV exterior.

So how to combat this problem? I like to extend the UV protection on my RV by using a synthetic wax product as well.

The product that I like to use is Meguiar’s Ultimate Fast Finish in the spray form. It is touted on the can as providing paint protection for up to a year.

I’m not sure that I would completely buy into that completely. But I can say that it appears to do a great job if applied every six months or so.

And the good news is that it can be applied using the same mop and pole system that I use for the Wash Wax All product. Simply spray it on the mop head and apply with the wet side, and then wipe smooth with the dry side.

So every six months I clean and wax the coach with either Wash Wax All or ONR. Then while it’s clean I extend the protection with Ultimate Fast Finish.

It has worked very well on both my RV and my towed vehicle, a 2011 Honda Civic.

Meguiar’s Ultimate Fast Finish

(These are affiliate links for the product on Amazon. It does not cost you any extra to buy the product using my affiliate link if you choose to do so)

Conclusion

Almost anyone can use the products and tools that I have mentioned above for a high quality RV wash and wax.

It’s not hard or difficult. That’s because the pole system makes it so easy. You can typically stand in one spot and cover a large area of the RV at one time.

If I take plenty of breaks and sit down for a while I can do my entire motorhome in an hour and a half. But if I stay at it, it’s only an hour.

If your RV is smaller than my 40 footer, it will take you even less time.

So why pay the professional detailers hundreds of dollars a year for an RV wash and wax job when you can do it simply and easily yourself?

Have safe and happy travels my friends!

Pro Tips For RV Slide Out Maintenance

Performing RV slide out maintenance on a regular basis will save you thousands of dollars in RV slide repairs. And it doesn’t matter what kind of rig you own.

Slide out rooms can be found on many kinds of RVs. Even smaller travel trailers are often coming with slide outs now. Essentially, a slide out allows you to open up the interior of your RV and make it feel so much more roomy inside.

But to get that extra room, the manufacturer has to cut a large hole in the side of the RV. Then they put the slide out on a mechanism that moves it in and out as you wish.

And to keep water and debris out of the RV, slide seals or gaskets are put in place all around the slide. It all actually works surprisingly well.

But if you don’t maintain your RV slide outs, serious problems can develop. And some of these problems can cost thousands to fix and repair.

So it makes a lot of sense to practice a little preventative maintenance on your RV slide outs. If you do, the time and effort you spend will come back to you in slide out repair savings over time!

Disclosure: Please note this post may contain affiliate links. This means – at no additional cost to you – I earn a commission if you make a purchase using our affiliate links. I only link to products and companies I use and feel comfortable recommending. The income goes toward supporting the free content on this website.

More RV Articles You Might Like To Read

So what are RV inverter generators anyway? One thing they are not is the loud and obnoxious construction type of ...
A discussion of 5th wheels vs travel trailers is a battle of the towable RVs. So if you have decided ...
This article will explain how you can buy a luxury diesel pusher motorhome for less than $100K. Now that may ...
RV boondocking means camping without any hookups. No electric, water or sewer hookups whatsoever. You are totally self-contained. Of course, ...

RV Slide Out Seals

The rubber seals or gaskets that surround the slide-out can be referred to by any number of names. Some call them a wiper seal, sweeper seal or flapper seal. But they all do the job they are intended to do.

They are your first line of defense against having the elements seep into your RV, especially water. Replacing the seals on a single slide out can cost $1000 or more. So it makes sense to keep them in good shape.

There are any number of products for slide out seal conditioning. The primary function of these products is to keep the rubber seals supple and prevent them from drying out.

And they also need to provide protection against UV damage from the sun.

In fact, ultraviolet damage is what slowly breaks down these seals more than anything else and they can become brittle. At that point it is easy for cracking to begin, which allows moisture to seep into the RV.

To prevent this, I like to use a product that has been especially formulated for protecting rubber and vinyl seals and gaskets. It’s called 303 Aerospace Protectant.

It is very easy to apply and will immediately improve the look and feel of your slide out seals. It is also a very high quality UV inhibitor.

So regular application of this product should keep your slide out seals in good shape for a very long time. Applying the product on the outside of the seal and between the seal and the slide is all that’s needed.

I like to condition my RV slide out seals about every 3 – 4 months. You can choose your own schedule but the more often you do it, the better.

Click on this link to find out more about 303 Aerospace Protectant

(This is an affiliate link for the product on Amazon. It does not cost you any extra to buy the product using my affiliate link if you choose to do so)

Keep Your Slide Out Seals In Place

One of the most common problems I see with slide out seals is that the seal doesn’t completely flip into place when the slide is out. This can leave the seal looking odd in that some parts of the seal wiper is in place and others aren’t.

This also isn’t the best way to prevent water intrusion either. It’s only when the seal lies perfectly flat against the slide out that the best water prevention takes place. So how do you manage to get the entire seal to flip out and lie flat when the slide is extended?

One way is to physically flip it into place by hand using a ladder. But this is time consuming and carries an element of danger on the ladder.

But one of the best solutions I have found is to use furniture bumpers to do the job for you. Simply place about 4 – 5 of them in the middle of the slide out spaced out equally along the height of the slide.

Then when the slide goes in they flip the wiper in and when it comes out they flip the wiper into place when the slide is extended.

It’s a simple solution that doesn’t cost much money and saves lots of time and effort. You can check out these self-adhesive furniture bumpers on Amazon below.

Click here to view self-adhesive furniture bumpers for use on RV slides

(This is an affiliate link for the product on Amazon. It does not cost you any extra to buy the product using my affiliate link if you choose to do so)

RV Slide Out Lubrication

There is one other area of the RV slide out that needs lubrication and care. And that is the tracks where the slide moves in and out mechanically.

These metal tracks can become filthy and and even rusty over time. And that is when you will start to hear loud groans and noises as the slides move in and out.

Of course, this puts more pressure on the slide out motor too. So lubricating the tracks of the slide out will help make the whole slide mechanism last longer and work better.

For this job, I like to use the 3-in-1 product called “Slide Out Silicone Lube”. I find that it works very well for this purpose.

There are other products that also do a fine job. Whatever you use, just make sure that it does not leave a slick or gummy residue behind. If so, dirt and grime will be attracted to it and can even make the slide out tracks worse than before.

Lubricating the RV slide out tracks a few times every year will keep them in good working order though. You can read more about the 3-in-1 product that I use below.

It’s in the green can. But they also make other great lubrication products for window glass and rubber seals too. You can check them all out below.

Click here to view 3-in-1 silicone lube for RV slide tracks and gears

You can click here for 3-in-1 window track lube

Or click here for 3-in-1 rubber seal conditioner

(This is an affiliate link for the product on Amazon. It does not cost you any extra to buy the product using my affiliate link if you choose to do so)

RV Slide Out Tops

One area of slide out care that often gets overlooked is the top of the slide room. You have to give this are more attention if you don’t have an rv slide topper.

Slide toppers are helpful add-ons that can protect the top of the rv slide from debris and dirt. And this can be invaluable if you camp near trees very often.

Trees are pretty and they can help shade your RV, but they also put off a lot of debris. This can include leaves and dead branches.

Then when you draw the slide room back into the RV, that debris on the slide top can easily harm the top seal or gasket.

So if you don’t have slide toppers, maybe you should consider them. But at least try to remember to clean off the top of your RV slide out before you break camp.

Some RVers use a long pole with a brush to get the job done. Others use a hand-held blower. And some can do the job from a ladder while others climb on the roof to get it done.

Try to determine what works best for your particular situation. But don’t leave debris on the top of your slides!

Conclusion

RV slide outs are just like so many other parts of an RV. If they get regular attention and maintenance, they will last for years and perform well.

But if you ignore them and do little to keep them in good working order, they will soon break down. And RV slides will usually leave you with a hefty repair bill when they do.

So if you begin to notice any issues with your RV slides not working like they should, get help fast. Don’t wait until the problem gets worse. It will only cost you more the longer you wait to repair the slide issue.

Of course, most RV slide outs make a certain amount of noise as they move in and out of the RV. But if you start to notice noises that are clearly not good, like grinding or popping, have a qualified RV tech take a look.

If you take good care of your RV slide out rooms, they will take good care of you for many years!

I hope these tips on how to maintain your RV slide out seals and tracks has been helpful. If you follow the suggestions provided, you should get good use and long life from your RV slide outs.

Please comment below and tell us about your experiences with RV slide out maintenance. Or maybe you have other suggestions on how to care for your slide outs. We would love to hear from you!

As always, have safe and happy travels my friends!
Get My FREE Camping Guide

“The Top 5 Ways To Save Money On Campground Costs”

Get My Newsletter

Save on RV repairs

Get the best RV gear

Learn about RV life

RV tips and tricks

And get my free guide – The Top 5 Ways To Save Money On Campground Costs”