5 Must Have RV Accessories We Wouldn’t Be Without

Some RV accessories look useful when you buy them, but eventually spend most of their time tucked away in a storage compartment. Others become part of your routine, and you wonder how you ever traveled without them.

That second group is what I want to share with you here. These are five must have RV accessories that we have come to appreciate through our own travels, from equipment that helps us monitor our tires to simple additions that make camping more comfortable.

As a certified RV inspector, I put a lot of value on equipment that helps you recognize a problem early. But I also appreciate anything that makes everyday RV life easier without taking up more space than it deserves.

So let’s look at why we like each accessory and whether it suits your camping style.
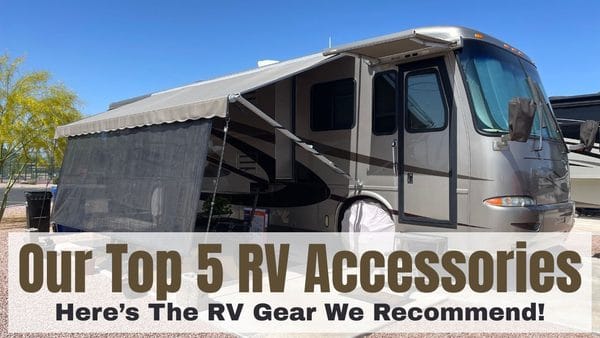
Our top 5 must have RV accessories video

Quick Answer

Our five favorites are an RV tire pressure monitoring system, an awning shade, roof vent covers, a portable RV water softener, and a portable ice maker. Together, they help us keep an eye on our tires, enjoy the campsite, improve ventilation, deal with hard water, and make better use of limited freezer space.

    1. An RV Tire Pressure Monitoring System

    Your tires are your connection to the road, and a tire problem can become serious quickly. That applies to your RV, your tow vehicle, and any vehicle you tow behind a motorhome.

    When I first started RVing, I checked all of our tire pressures manually. It took time, and getting to some of those valve stems meant plenty of bending down and getting back up again.

    Then someone recommended a tire pressure monitoring system, usually called a TPMS. What a difference that made in keeping track of our tires.
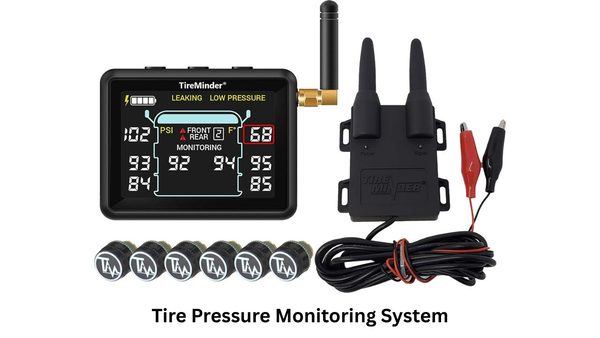
    A tire pressure monitoring system

    Why a TPMS Makes Travel Easier

    With our system, I can look at the monitor and see the reported tire pressures and temperatures. And while we’re traveling, alarms can alert me to readings that need attention.

    A manual pressure check tells you what is happening while you’re parked. A TPMS adds information during the trip, when you might otherwise have no idea that a tire is losing pressure or getting unusually hot.

    That is especially useful for a car being towed behind a motorhome. You may not feel a problem with that car’s tires from the driver’s seat of your RV.

    How Our TPMS Helped Us Avoid a Bigger Problem

    We had a tow bar arm break while traveling through Fort Worth, Texas, with our Honda CRV behind the motorhome. After replacing the tow bar, we encountered another problem because the new unit was unusually stiff.

    As we started towing again, both front tires on the CRV began getting too hot. Our TPMS alerted me, and we were able to get off the road and address the towing issue before continuing.

    Without that warning, I could have kept driving while the situation got worse. That experience is a big reason I recommend monitoring the tires on the vehicle being towed as well as those on the RV.

    I explain the event in more detail in RV Tow Bar Lessons Learned When Mine Broke.

    What to Check Before Buying a System

    Choose a system with enough sensors for your entire setup and a pressure range that suits your tires. Also check whether your rig’s length calls for a signal booster and whether the sensors are compatible with your valve stems.

    However, keep checking tire condition and setting the correct cold inflation pressure. A TPMS provides useful warnings, but it cannot prevent every tire failure or replace regular tire care. www.nhtsa.gov

    For help with inflation, read Correct RV Tire Pressures For Every Rig. And follow the monitoring system’s setup instructions so its alarms suit the tires you are monitoring.

    2. An RV Awning Shade

    Even our 40-foot diesel pusher only had so much living space inside. So being able to sit outside comfortably made the campsite feel much more spacious.

    An awning helps, but it does not always keep the sun off you. When the sun gets lower in the sky, it can shine right underneath the awning and across your chairs.

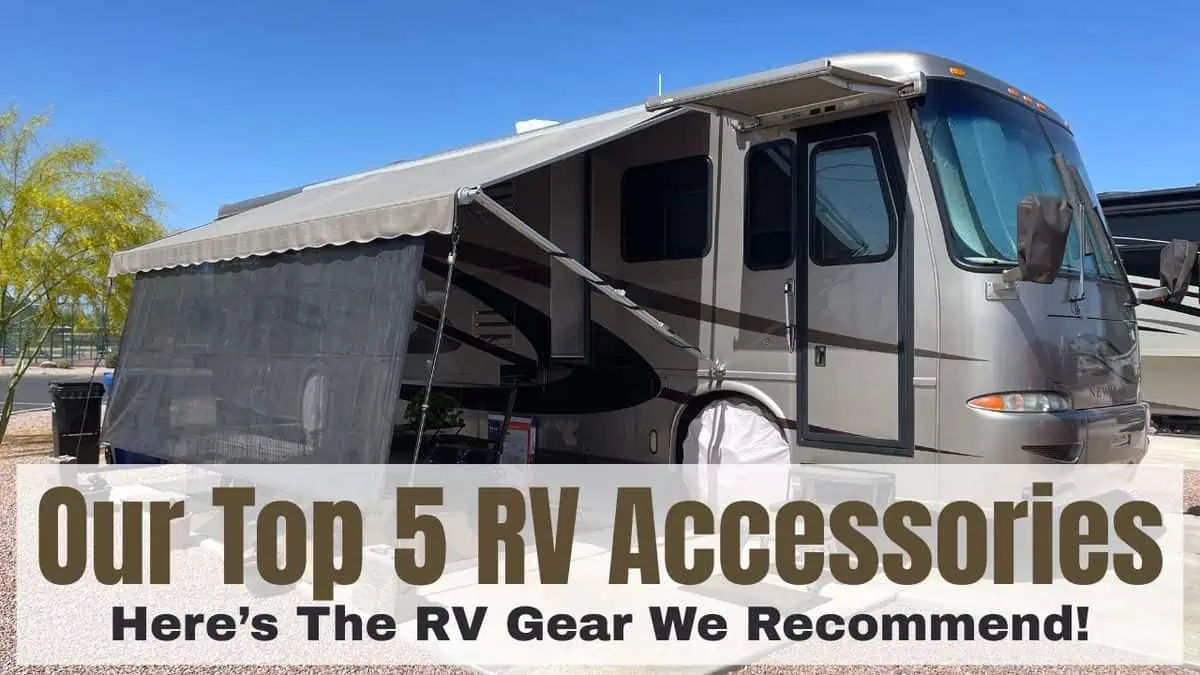
    That is where an RV awning shade becomes useful. It extends downward from the outer edge of the awning and helps block that low-angle sunlight.

    An RV awning is one of our must have rv accessories

    Creating a More Comfortable Outdoor Sitting Area

    The shade we used extended down toward the ground, leaving some space underneath. It made the area beneath our awning much more comfortable when the sun would otherwise have driven us indoors.

    And that gave us something like an outdoor room where we could relax and enjoy the campsite. For an accessory that packs away when you leave, that is a worthwhile improvement.

    Many shades use mesh fabric that reduces glare while allowing some airflow and visibility. But the amount of shade you get depends on the fabric, the sun’s angle, and how you position it.

    Choosing and Using an Awning Shade

    Check your awning’s design before ordering, including how the shade attaches and how much width and drop you need. Some products have a removable lower panel, which can simplify taking them down.

    Also check the instructions for any automatic awning retraction system. A shade attached to the ground may interfere with retraction, and different shade designs have different rules about what can remain attached when the awning rolls up. www.carefreeofcolorado.com

    So be ready to remove the shade and retract the awning when weather requires it. An awning shade improves comfort, but it does not make the awning safe in strong wind.

    You can find more advice in 5 Essentials That You Need To Know About RV Awning Care.

    3. RV Roof Vent Covers

    Roof vent covers are one of those accessories whose value becomes obvious after you use them. Our RV did not originally have them, but once we installed them, we really appreciated the difference.

    To be clear, I’m talking about the protective covers installed above the opening vent lids. The lid still opens underneath, while the cover helps shield the opening from the weather.
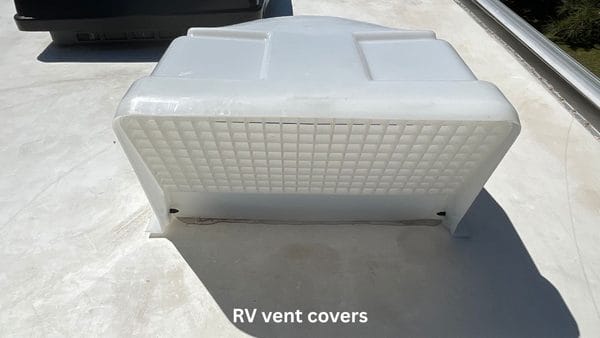
    RV vent covers

    Better Ventilation During Mild Weather

    When conditions are comfortable outside, opening windows and using the roof vents can move fresh air through the RV. That can reduce how often you need air conditioning, especially when the outdoor air is cooler than the interior.

    But without protective covers, rain can bring that ventilation to a stop. You have to close exposed vent lids to keep water from entering the RV.

    Our covers let us keep using the vents in rainy conditions that previously meant closing everything up. That made a noticeable difference in how comfortable the RV felt.

    Protection for the Vent Lids

    We have also traveled through several hailstorms, and I appreciated having another layer over those vent lids. The covers help shield the lids from direct weather exposure and sunlight.

    However, a vent cover can still be damaged, and it cannot guarantee protection from large hail or every wind-driven storm. If a cover is damaged, inspect the lid and the surrounding roof area as well.

    Some cover and vent combinations also allow ventilation while traveling. But check the instructions for your specific equipment before leaving a lid open on the highway. blog.airxcel.com

    Make Sure the Cover Fits the Fan

    A cover needs enough clearance for the lid to open and enough airflow for the fan underneath it. A high-output vent fan may need a cover designed specifically for that application.

    And remember that covered vents still need cleaning and inspection. Keep debris out of the airflow openings, and check the mounting hardware and nearby roof seals as part of your regular maintenance.

    Roof vent covers made our existing ventilation system more useful, and they are worth considering if your RV has exposed vent lids.

    4. A Portable RV Water Softener

    We encountered plenty of hard water as we traveled across the country. And after dealing with its effects, a portable RV water softener became one of our favorite additions.

    Hard water contains dissolved minerals, mainly calcium and magnesium. Those minerals can contribute to scale in plumbing and water-heating equipment, along with buildup on faucets and showerheads. www.usgs.gov

    A portable RV water softener

    Why We Like Soft Water in the RV

    For us, the difference was especially noticeable in the shower. We preferred how soft water felt, and it made everyday washing more pleasant.

    Soft water also allows soap to lather more easily and helps reduce soap scum. So you may find that you need less soap than you were using with hard water.

    There is a practical maintenance benefit too. Reducing incoming hardness can help limit new mineral scale, although it does not eliminate the need to clean fixtures or maintain your water heater. For heaters that use one, anode-rod inspection and replacement is part of that maintenance.

    If you repeatedly camp where water is hard, this is an accessory worth a close look. You can learn more in An RV Water Softener System — Why You Really Need One.

    A Water Softener and a Water Filter Do Different Jobs

    A conventional water softener uses ion exchange to reduce hardness minerals. A water filter addresses whatever its particular design and rating cover, such as sediment or certain taste and odor problems.

    So don’t assume that an ordinary inline filter will soften your water. And don’t assume that softened water has been disinfected or made safe from every possible contaminant.

    Choose the treatment equipment that suits the water source and follow its installation instructions. A softener also does not replace your water pressure regulator.

    Allow for Storage and Regeneration

    Portable softeners need periodic regeneration to restore their ability to soften water. Many RV models use salt for this process, but the procedure and interval depend on the unit and the water you use. www.portablewatersoftener.com

    Check the unit’s size, weight, and storage requirements before buying. And follow its directions for rinsing, winter protection, and any required maintenance.

    If your usual campgrounds already supply soft water, you may see less benefit. But for our travels, it was an accessory we were very glad to have.

    5. A Portable Ice Maker for RV Camping

    A portable ice maker may seem like a small convenience, but we came to appreciate ours quickly. When your freezer is small, the space occupied by ice trays can feel like a lot.

    And after using the ice in those trays, you have to wait for another batch to freeze.
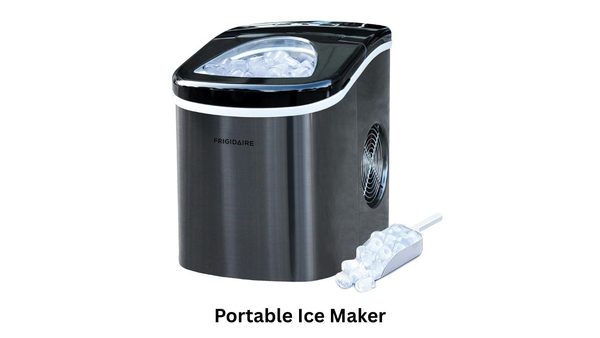
    A portable ice maker

    Making Ice Without Filling the Freezer With Trays

    Our portable ice maker started producing ice in minutes. We could keep making more as needed instead of relying entirely on whatever was already frozen in trays.

    That was handy for everyday drinks and warm afternoons at the campsite. We could also make ice ahead of time and put it into smaller bags in the freezer.

    Flexible bags were easier for us to fit around the food than rigid trays, although the ice still occupies space.

    Remember That Most Portable Ice Makers Do Not Store Frozen Ice

    Most countertop ice makers have an ice basket rather than a refrigerated freezer compartment. So ice left in the basket eventually melts, with many machines returning that water to the reservoir. www.newair.com

    Use the ice as you make it, or transfer it to your freezer if you want to keep it. Also check the machine’s batch size and production rate, since it needs time to make additional ice.

    Check Your Counter Space and Power Supply

    Before buying, think about where the ice maker will sit and how much ventilation space it requires. You will also need somewhere to secure it for travel.

    Most countertop models need 120-volt power, so consider your electrical setup if you camp without hookups. And follow the cleaning instructions, using water suitable for drinking.

    If your refrigerator already produces all the ice you need, this accessory may be unnecessary. But with a small freezer and a regular need for ice, it can be a very useful addition.

    For more about your cooling and storage options, see my RV Refrigerator Comparison.

    How to Choose Your Own Must Have RV Accessories

    Start with the problems you actually encounter. If you regularly need better shade, struggle with hard water, or wish you had more freezer space, those are useful clues about what deserves room in your RV.

    I would put tire monitoring high on the list because of the information it provides while traveling. After that, your usual weather, campground water, and daily habits can help you decide which comfort upgrades matter most.

    Also consider setup time, storage space, weight, and ongoing maintenance. An accessory is more likely to earn its place when you use it regularly and can carry it conveniently.

    For additional ideas, take a look at The Best RV Accessories For Travel And Camping. That article covers more of the useful gear we have enjoyed in our travels.

    Frequently Asked Questions

    Which of These RV Accessories Would You Buy First?

    I would give a tire pressure monitoring system strong consideration first, especially if you tow a car or trailer. It can provide warnings about tire problems you might not otherwise notice while driving.

    Does a TPMS Replace Checking Tires Before a Trip?

    No, you still need to inspect your tires and verify proper cold inflation pressure. Check that the system is reporting current readings and that its sensors and alarms are working properly.

    Can You Leave RV Roof Vents Open in the Rain?

    A compatible protective cover can allow ventilation in rainy conditions. However, follow the cover and vent manufacturers’ instructions, and close the vents if conditions allow water to enter.

    Is a Portable RV Water Softener Worth It?

    It can be worthwhile if you frequently encounter hard water and want to reduce scale and soap scum. The benefit will be smaller if the water you normally use is already soft.

    Will a Portable Ice Maker Keep Ice Frozen All Day?

    Most countertop models will not, because their storage baskets are not freezers. Transfer finished ice to your RV freezer if you need to keep it frozen for later.

    Conclusion

    These five must have RV accessories earned their place through our own travel experiences. We relied on the TPMS for useful tire warnings, while the awning shade, vent covers, water softener, and ice maker helped make camping more comfortable.

    Start with the accessories that would make the biggest difference for you, and give each purchase a purpose.

    And I would love to hear about the accessories you wouldn’t be without. Leave your favorites in the comments so other RVers can learn from your experience too.

    Have safe and happy travels, my friends. Until next time.
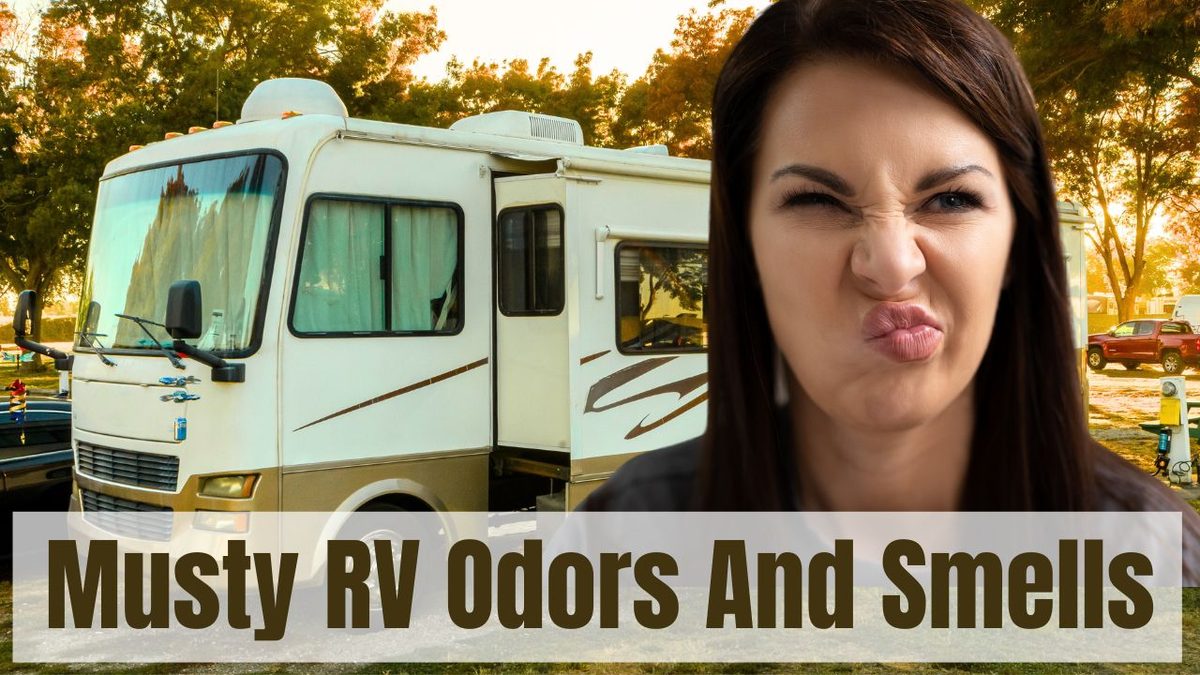
    How to Get Rid of RV Odors and Keep Them From Coming Back

    An RV owner has to learn about how to get rid of RV odors if they want to really enjoy their RV.

    Because one of the quickest ways to spoil an otherwise enjoyable camping trip is to have a bad odor inside your RV.

    Unfortunately, experienced RV owners know that unpleasant smells can develop for several reasons. They may come from the black or gray tank, excess moisture, spoiled food, pets, plumbing components, or something hidden inside the RV.

    The key to learning about how to get rid of RV odors is to identify and correct the source. Air fresheners may cover a smell temporarily, but they usually do not solve the actual problem.

    So let’s look at five common types of RV odors, what may be causing them, and how you can remove them.

    My video on how to get rid of RV odors

    1. How to Eliminate RV Sewer Smells

    A sewer odor is probably the smell that RV owners complain about most often. It is unpleasant, persistent, and hard to ignore in such a small living space.

    Many RVers immediately assume that the black tank needs to be cleaned. That may be true, but an RV sewer smell can come from several other sources too.

    Start With the Black and Gray Tanks

    Waste can accumulate on the walls and bottom of an RV holding tank. Over time, this material can create stubborn odors that ordinary dumping does not remove.

    The black tank gets most of the attention, but do not overlook the gray tank. Food particles, grease, soap residue, hair, and other organic material can build up inside it and produce an odor that is surprisingly similar to a sewer smell.

    Start by dumping and thoroughly flushing both holding tanks. If your RV has a built-in black-tank flush, use it according to the RV manufacturer’s instructions.

    However, never turn on the black-tank flush and walk away. The black-tank valve should be positioned as required by your system’s instructions, and you must monitor the process continuously to prevent an overflow.

    Consider Professional RV Tank Cleaning

    If the odor has been present for a long time and normal flushing does not correct it, you may need a professional RV holding-tank cleaning service.

    These companies use specialized equipment to remove hardened waste, mineral deposits, and other material from the tank’s interior surfaces. A professional cleaning may also help restore inaccurate tank sensors that have become coated with debris.

    To find a service, search online for “RV black tank cleaning service near me.” Some companies operate regionally or nationwide, so compare customer reviews and ask what cleaning method they use.

    Once the tanks are clean, good habits can help keep them that way.

    Use Plenty of Water in the Black Tank

    Too little water is one of the most common causes of RV black-tank problems. And it’s an easy way to get rid of RV odors.

    Waste needs enough liquid to remain suspended and flow out of the tank when it is dumped. When RV owners conserve too much water while flushing, solids and toilet paper can accumulate inside the tank.

    So use plenty of water with each flush. After dumping, add enough water to cover the bottom of the tank before using it again, following any recommendations from your RV or tank manufacturer.

    Also, avoid leaving the black-tank valve open while connected to a sewer at a full-hookup campsite. Liquids can drain away while solids remain behind, eventually creating the dreaded “poop pyramid.”

    Keep the valve closed, allow the tank to fill, and then dump it when necessary.

    Use an Effective Holding-Tank Treatment

    A holding-tank treatment can help control odors and break down waste between dumps. However, it should support good tank practices rather than replace them.

    I have had good results with Happy Campers holding-tank treatment, and many other RV owners report similar experiences. Unlike a heavily perfumed product that mainly masks an odor, a good treatment helps manage the waste responsible for it.

    Whatever product you choose, make sure it is compatible with your RV’s plumbing system and follow the directions on the container.

    If you do, it can be a great way to get rid of RV odors.

    Check the Plumbing Before Blaming the Tanks

    If cleaning the holding tanks does not eliminate the odor, start checking the plumbing system.

    Every sink and shower drain should have water in its P-trap. That water forms a barrier that helps prevent tank gases from entering the RV.

    A P-trap can dry out while an RV is stored. Therefore, run a little water into every sink and shower drain before assuming that the tank itself is the problem.

    Many RVs also have air admittance valves beneath the sinks. These inexpensive plumbing valves allow air into the drain system but should prevent odors from coming back into the RV.

    If an air admittance valve sticks open or fails, gray-tank odors may enter through the cabinet below the sink. Replacing a failed valve often solves a mysterious sewer smell quickly.

    Also inspect the toilet bowl seal. A small amount of water should normally remain in the bowl and create a seal against black-tank gases.

    If the water gradually disappears, the toilet seal may be dirty, dry, damaged, or worn out.

    Finally, examine the roof vents for the holding tanks. A blocked or improperly functioning vent may allow odors to enter the RV instead of escaping above the roof.

    2. How to Remove Musty RV Smells

    A musty odor usually indicates excess moisture somewhere inside the RV. It is especially common in humid climates and in RVs that remain closed for long periods.

    The smell may be coming from damp carpeting, upholstery, bedding, cabinets, storage compartments, or condensation on hidden surfaces.

    However, a persistent musty smell may also indicate a plumbing leak, exterior water intrusion, or mold growth. That means it should never be dismissed as nothing more than stale air.

    Air Out the RV Thoroughly

    Start with the simplest approach: ventilate the RV. It’s a quick and easy way to get rid of RV odors.

    Open the windows, doors, and roof vents when weather conditions allow. Turn on the vent fans and use portable fans to keep air moving through the interior.

    Remove bedding and cushions if they feel damp or smell stale. Air them outdoors in a dry location when possible.

    In many cases, good ventilation will remove an odor caused by an RV being closed for a while. However, if the smell returns shortly after you close it again, excess moisture is probably still present.

    Look for the Source of the Moisture

    Check beneath sinks, around the toilet, near the shower, and around the water heater and plumbing connections. Feel for damp flooring and inspect inside lower cabinets and exterior storage compartments.

    Next, look around windows, doors, roof openings, slideout corners, and wall-to-roof seams for staining, softness, discoloration, bubbling, or other evidence of water intrusion.

    Water can travel through an RV’s wall or ceiling before it becomes visible. Therefore, the place where you notice a stain may not be the actual source of the leak.

    If you find unexplained moisture or signs of water damage, correct the leak before trying to remove the odor. Otherwise, the smell will continue to return, and the underlying damage may become much more expensive.

    For more help preventing these problems, see my collection of RV maintenance tips that can save time and money.

    Use Moisture Absorbers Appropriately

    Bags of activated charcoal may help capture some odor-causing compounds in the air. They are inexpensive, reusable in some cases, and easy to place in cabinets or storage areas.

    A moisture-absorbing product such as DampRid can also help in smaller enclosed areas. These products collect moisture, though, so place them where the container cannot tip or spill while the RV is moving.

    Moisture absorbers can be helpful during storage, but they have limited capacity. They will not correct an active water leak or control the humidity in a heavily damp RV.

    But used correctly, they are a great way to get rid of RV odors.

    Use an RV Dehumidifier

    A small dehumidifier may be a better solution if you live or camp in a humid area.

    Choose one that is appropriate for the size and temperature of your RV. Also, make sure you can empty it regularly or arrange for safe continuous drainage.

    A simple digital hygrometer can help you monitor the relative humidity inside the RV. If the humidity remains high for extended periods, moisture can collect on windows, walls, mattresses, and other cool surfaces.

    Reducing the humidity helps protect the RV as well as making the interior feel and smell more comfortable.

    According to the EPA, mold needs moisture and oxygen to grow, so controlling the moisture source is the essential first step—not merely covering the resulting odor. Learn more about moisture and mold from the EPA.

    3. How to Remove Odors From an RV Refrigerator

    RV refrigerators are compact, and there is very little space for an unpleasant smell to disperse. A leaking container or forgotten food item can make the entire refrigerator smell bad.

    The problem becomes even worse when an RV refrigerator is turned off and closed during storage.

    This affects a lot of RVers and is a good reason why you should learn how to get rid of RV odors from this source.

    Empty and Clean the Refrigerator

    Remove all food, shelves, drawers, and removable containers. Check carefully for spills beneath the drawers and along the edges of the shelves.

    Clean the interior with a mild solution recommended by the refrigerator manufacturer. A mixture of baking soda and water is commonly used because it cleans without leaving a strong perfume behind.

    Use a soft cloth to wipe the walls, shelves, seals, drawers, and door compartments. Do not use harsh cleaners or abrasive pads that could damage the interior surface.

    After cleaning, dry everything thoroughly before returning the shelves and drawers.

    Check the Drain and Drip Area

    Some RV refrigerators have a condensate drain tube that carries moisture to a small collection or evaporation container outside the refrigerator.

    If the drain becomes blocked or the container accumulates dirty water and debris, it may produce an unpleasant odor. Consult the refrigerator manual to find and clean these components safely.

    Also inspect the door seals. Food residue and moisture can collect in the folds where they may not be immediately visible.

    Keep the Doors Open During Storage

    When the refrigerator is turned off, remove all food and wipe the interior dry. Then leave the refrigerator and freezer doors propped open.

    Many RV refrigerators have a storage position or latch that holds the doors slightly ajar. This airflow helps prevent mildew and stale odors from developing.

    Placing an open box of baking soda inside may help absorb mild food odors while the refrigerator is operating. However, it is still important to clean spills and remove old food instead of relying entirely on the baking soda.

    You can find more information about caring for major RV components in my RV systems and equipment guide.

    4. How to Control Pet Odors in an RV

    Many of us love traveling with our pets, but a small RV can hold pet odors more noticeably than a house. And they are one of the biggest reasons you may have to get rid of RV odors.

    Hair, dander, damp fur, bedding, accidents, and litter boxes can all contribute to the problem. Fortunately, a regular cleaning routine can keep most pet smells under control.

    Clean the Pet and Its Belongings

    Regular grooming and bathing can reduce the amount of odor, hair, and dander brought into the RV. Of course, not every pet is enthusiastic about bath time, including ours.

    Wash pet bedding and blankets regularly. Clean food bowls, water bowls, carriers, toys, and any favorite places where your pet sleeps.

    Vacuum upholstery, carpets, and corners where hair collects. If your RV has removable cushion covers, wash them according to the manufacturer’s instructions.

    For an accident on carpet or upholstery, use a cleaner designed to break down pet-related organic material. Always test the product in an inconspicuous area first to make sure it does not damage or discolor the surface.

    Consider a Small Air Purifier

    A portable air purifier with an appropriate particle filter can help capture airborne pet hair and dander. A unit that includes activated carbon may also reduce some odors.

    Choose a purifier sized for the RV’s interior and replace or clean its filters as recommended. A dirty filter can reduce performance and may eventually become a source of odors itself.

    However, remember that an air purifier is a supplement to cleaning. It cannot remove the source of an odor from dirty bedding, carpet, upholstery, or a hidden pet accident.

    5. How to Track Down a Strong Unidentified RV Odor

    Sometimes an RV develops a strong smell that does not respond to ordinary cleaning. When that happens, do not immediately try to overpower it with fragrance or a more aggressive treatment.

    Instead, become an odor detective. It’s the first step in learning how to get rid of RV odors.

    Try to determine where the smell is strongest and when it appears. Does it become worse when the air conditioner runs, when a particular sink is used, after rain, or when the RV has been closed?

    Those clues may lead you to the actual cause.

    Check for Hidden Sources

    Inspect areas that are easy to overlook, including:

    • Beneath and behind furniture
    • Under mattresses and cushions
    • Inside cabinets and exterior compartments
    • Around plumbing connections
    • Near heating ducts and floor registers
    • Behind the refrigerator
    • Around the water heater
    • Beneath sinks and the shower
    • Inside the basement or underbelly
    • Near the house batteries
    • Around stored food and pet supplies

    A dead rodent, damaged battery, electrical component, propane leak, plumbing leak, or hidden water intrusion can all create a strong odor.

    If you smell propane, rotten eggs, burning material, hot wiring, or overheated plastic, leave the RV and investigate from a safe location. Do not use an open flame or operate electrical switches while trying to find a possible gas leak.

    Contact a qualified RV technician or emergency service when appropriate.

    Should You Use an Ozone Generator in an RV?

    Ozone generators are sometimes promoted as a solution for stubborn odors, and professional restoration companies may use ozone under controlled conditions.

    However, I no longer recommend that an RV owner casually buy an inexpensive ozone generator and operate it as a general air cleaner.

    The EPA warns that inhaled ozone can damage the lungs and cause coughing, chest pain, throat irritation, and shortness of breath. It may also worsen asthma and other respiratory conditions.

    In addition, concentrations low enough to remain within public-health limits are generally ineffective against many indoor contaminants and odor-causing chemicals. Ozone can also produce irritating byproducts and damage rubber, electrical-wire coatings, fabrics, dyes, and other materials—all of which may be present in an RV.

    If severe smoke or another deeply embedded odor remains after the source has been removed, consult an experienced restoration professional. Nobody, including people, pets, or plants, should be exposed to an ozone treatment, and the RV must be properly ventilated and confirmed safe before reentry.

    You can read the complete EPA guidance concerning ozone generators.

    The Best Way to Keep an RV Smelling Fresh

    The most effective approach to RV odor removal follows three steps:

    1. Find and eliminate the source.
    2. Ventilate the RV with fresh outdoor air.
    3. Use appropriate air cleaning or moisture control as a supplement.

    That order matters. Fragrances, charcoal, air purifiers, and moisture absorbers can be useful, but none can permanently correct a dirty holding tank, failed plumbing valve, leaking roof, pet accident, or spoiled food.

    Regular cleaning and maintenance will also prevent many odors from developing. My article about the biggest RV mistakes owners make covers other simple habits that can help protect your RV.

    And the tips found in this article should help you be able to get rid of RV odors effectively.

    Frequently Asked Questions About RV Odors

    Why does my RV smell like sewer gas?

    Possible causes include dirty black or gray tanks, a dry P-trap, a failed air admittance valve, a toilet bowl seal that will not hold water, or a blocked holding-tank roof vent.

    Start by identifying where the smell is strongest before paying for a tank cleaning or replacing components.

    Why does my RV smell like sewer gas after dumping?

    Waste may remain in the tanks, or the dumping process may create pressure changes that allow odors to enter through a plumbing problem.

    Flush the tanks, add water back to the black tank, fill dry P-traps, check the toilet seal, and inspect the air admittance valves and roof vents.

    How do I stop my RV black tank from smelling?

    Use plenty of water, keep the black-tank valve closed between dumps, flush the tank regularly, and use a suitable holding-tank treatment according to its directions.

    If hardened waste has accumulated, a professional tank cleaning may be needed.

    Why does my RV smell musty?

    A musty RV smell usually indicates excess moisture. The cause may be humidity, condensation, damp fabric, a plumbing leak, or exterior water intrusion.

    Air out the RV, reduce the humidity, and inspect carefully for moisture damage. If the odor returns, continue looking for the underlying source.

    Can I leave DampRid in my RV during storage?

    A moisture absorber may help in a small, enclosed RV, but its container can fill and spill. Position it securely, inspect it regularly, and follow the product instructions.

    For ongoing high humidity, a properly sized dehumidifier may provide better control if reliable electrical power and safe drainage are available.

    Will an air purifier remove RV odors?

    An air purifier can reduce airborne particles, and activated carbon may help with certain odors. However, it cannot eliminate an odor source such as dirty fabric, standing water, spoiled food, a plumbing problem, or a contaminated holding tank.

    Is an ozone generator safe to use in an RV?

    Ozone can harm people and animals, and it may damage materials inside an RV. It should never be used as an air purifier in an occupied space.

    For an extreme odor requiring restoration work, consult a qualified professional rather than treating the RV casually with a consumer ozone machine.

    Conclusion

    Unpleasant RV odors are more than an annoyance. In some cases, they are an early warning of a holding-tank problem, plumbing failure, moisture intrusion, electrical issue, or another condition that deserves attention.

    So do not settle for covering a bad smell with perfume. Locate the source, correct the underlying problem, clean the affected area, and then use ventilation, moisture control, or air filtration where appropriate.

    When you follow that process, your RV can continue looking good, working well, and smelling fresh throughout your camping and travel adventures.

    Have safe and happy travels, my friends!

    Winter RV Camping: 7 Essential Tips Every RVer Should Know

    Many RV owners put their RVs into storage as soon as cold weather arrives. However, winter RV camping can offer some experiences that are difficult to find during the busier travel season.

    RV parks and campgrounds are often much less crowded, assuming they remain open through the winter. Popular destinations may also have fewer visitors, shorter lines, and sometimes lower admission or camping prices.

    And there is just something special about sitting around a campfire on a cold evening.

    However, cold weather RV camping requires preparation. An RV is not built like a conventional house, and low temperatures can affect its plumbing, holding tanks, batteries, heating system, and interior comfort.

    So let’s cover seven winter RV camping tips that can help you stay warm, prevent frozen pipes, and protect your RV in colder weather.

    My winter RV camping video

    Understand What Winter RV Camping Really Requires

    There is a major difference between spending one chilly night in an RV and camping for several weeks in sustained freezing weather.

    Temperatures in the upper 30s may require little more than running the furnace and adding a blanket. On the other hand, several days below freezing can threaten exposed hoses, water lines, valves, holding tanks, and other components.

    Wind also makes cold-weather camping more difficult. Moving air pulls heat away from the RV and enters through small openings around slides, doors, windows, and utility compartments.

    Therefore, always check the complete weather forecast before traveling. Pay attention to overnight lows, wind, precipitation, and how long freezing conditions are expected to last.

    Your preparations should be based on the coldest conditions you may encounter, not the average daytime temperature.

    Tip #1: Start With a Four-Season-Capable RV

    If you expect to camp regularly in cold weather, it is best to begin with an RV designed for extended-season use.

    You will often hear these RVs described as “four-season” models. However, the RV industry does not have one universal standard that every manufacturer must meet before using that description.

    As a result, a four-season label does not guarantee that an RV can handle every winter climate.

    A label often found on RVs advertised as 4 season capable

    What Makes an RV Four-Season Capable?

    Although manufacturers define the term differently, certain features can make an RV much better suited to cold-weather camping.

    Look for:

    • Higher insulation values in the roof, walls, and floor
    • True dual-pane insulated windows
    • An enclosed and insulated underbelly
    • Heated holding tanks or tank compartments
    • Protected water lines and dump valves
    • A furnace sized appropriately for the RV
    • Furnace ducting that sends heat into plumbing and tank areas
    • Insulated storage and utility compartments
    • Fewer obvious air leaks around slides, doors, and windows

    Some manufacturers advertise impressive insulation ratings, but those numbers can be difficult to compare. Ask how the insulation is installed, which areas are protected, and whether the plumbing and holding tanks receive active heat.

    My article on what makes an RV four-season capable explains these features in more detail.

    Know the Limits of Your Particular RV

    Even a well-built four-season RV has limits.

    An RV may perform well during occasional nights below freezing but struggle during an extended period of extreme cold. Slide rooms, large windows, and exposed utility areas can still lose a significant amount of heat.

    So read the manufacturer’s information for your specific model. Find out whether it has tank heaters, where the water lines run, and whether the furnace heats the underbelly.

    It is also helpful to place remote temperature sensors in vulnerable compartments. That allows you to monitor what is happening around the plumbing instead of assuming those spaces are warm enough.

    Tip #2: Add Insulation Where Your RV Loses Heat

    Even if your RV has factory insulation, you can often improve its cold-weather performance.

    Windows, roof vents, skylights, cargo doors, slide rooms, and other openings can allow heat to escape quickly. Adding insulation in those areas can make the interior more comfortable and reduce how often the furnace must run.

    Using Reflective Insulation in an RV

    Many RV owners use reflective insulation material, often known by the brand name Reflectix.

    Reflectix insulation

    It is lightweight, easy to cut, and convenient to store. And it can be placed inside closets or cabinets against exterior walls, where it adds another barrier without affecting the appearance of the living area.

    It can also be used inside poorly insulated cargo doors and other compartments.

    However, reflective insulation is not a replacement for thick conventional insulation. Its effectiveness also depends partly on how it is installed, and reflective materials usually perform best when used with an adjacent air space.

    So think of it as one part of your cold-weather plan rather than a complete solution.

    Insulating RV Windows

    Windows can be one of the greatest sources of heat loss in an RV.

    Reflective insulation cut to fit the windows can help, but it also blocks most outside light. The RV may feel dark during the day, and you may need to use the interior lights more often.

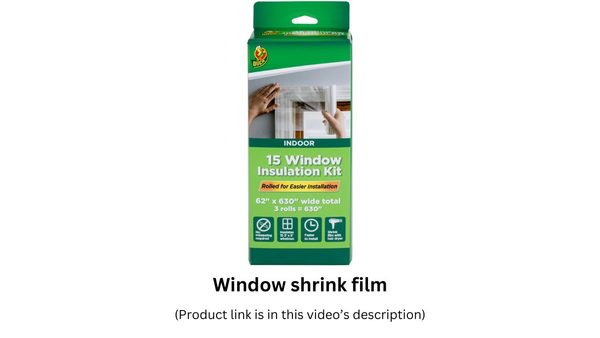
    Other choices include shrink-film window insulation kits and bubble-wrap-style window coverings. These options may allow more light into the RV, although they can reduce or distort the view.

    Shrink-film window insulation kit

    Heavy curtains or insulated window coverings can also help, especially at night.

    However, periodically remove any window coverings and check for condensation. Moisture can collect between the covering and the glass, eventually contributing to mold, stains, or damage around the window.

    Insulating Roof Vents and Skylights

    Warm air rises, so roof vents and skylights can allow a surprising amount of heat to escape.

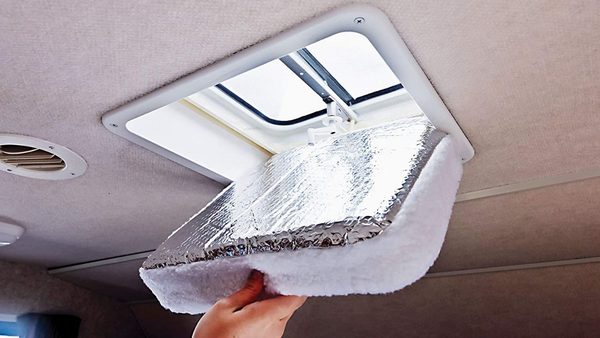
    Insulated vent cushions or pillows are inexpensive and easy to install. You simply fit them into the vent opening when the vent is not being used.

    Insulated pillows for RV vents

    Similar insulation can be made or purchased for skylights.

    These products are useful in both hot and cold weather. During winter, they help keep warm air inside, while in summer they can reduce the amount of heat entering through the roof.

    Just remember that your RV still needs ventilation. Do not seal every vent tightly while producing moisture through cooking, showering, breathing, or propane use.

    You can see similar insulation methods in my article on keeping an RV cool in summer, because many of the same areas that admit summer heat allow warmth to escape in winter.

    Tip #3: Protect Your Freshwater System From Freezing

    The freshwater system is one of the most vulnerable parts of an RV during winter RV camping.

    A frozen water hose is inconvenient. But a frozen pipe, fitting, filter housing, or pump can split and create extensive water damage after it thaws.

    So protecting the entire water path is essential.

    Use a Heated Drinking-Water Hose

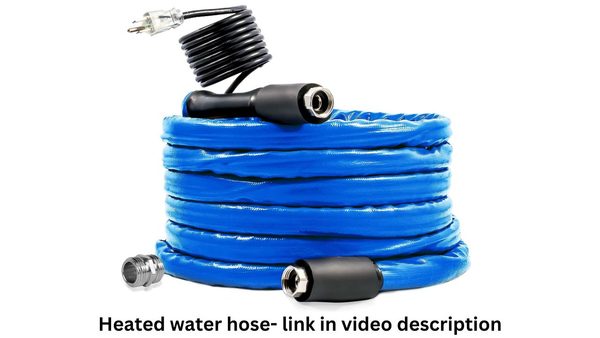
    If you will remain connected to campground water during freezing temperatures, consider using a heated RV water hose.

    A heated RV water hose for winter RV camping

    Choose one that is specifically designed for potable water and outdoor RV use. Follow its temperature limitations and all of the manufacturer’s installation instructions.

    A heated hose normally requires electrical power, so use a properly grounded and protected outlet. Keep electrical connections dry and do not use a damaged cord or hose.

    Also, remember that a heated hose protects only the hose itself.

    The campground faucet, pressure regulator, filter, exposed fittings, and the connection at the RV can still freeze. These areas may require properly designed insulation or thermostatically controlled freeze protection.

    Do not wrap electrical heating products around hoses, valves, or fittings unless the product is specifically approved for that purpose.

    Fill the Freshwater Tank Instead

    If you do not want to leave a heated hose connected, use your regular drinking-water hose only when filling the RV’s freshwater tank.

    Connect the hose, fill the tank, and then disconnect it. Drain the hose completely and store it somewhere protected from freezing.

    You can then use the RV’s water pump until the tank needs to be filled again.

    This method requires more work, but it removes several feet of exposed water hose from the equation. It can be especially useful during short periods of freezing weather.

    However, it works best when the freshwater tank and associated plumbing are inside a heated or enclosed area.

    Keep the Wet Bay and Water Pump Warm

    Your wet bay may contain water connections, valves, filters, and other components that can freeze.

    Some RV furnaces send warm air into this area. If yours does, operating the propane furnace regularly may be necessary even when you are using electric heat inside the RV.

    You can also use a purpose-built, thermostatically controlled compartment heater if it is approved for the location and installed according to its instructions.

    Avoid improvised heat sources, exposed bulbs, or ordinary household heating pads in enclosed utility compartments. They may contact combustible materials, moisture, plastic plumbing, or wiring and create a fire or electrical hazard.

    Finally, place a remote thermometer or temperature sensor in the wet bay. The living area can feel warm while a plumbing compartment is approaching freezing.

    Tip #4: Prevent Your Sewer Hose and Valves From Freezing

    A frozen freshwater hose is frustrating. A frozen sewer hose is even worse.

    Liquid remaining in the sewer hose can freeze, expand, and damage the hose or fittings. It can also create a blockage that prevents the holding tanks from draining.

    Do Not Leave the Sewer Hose Open Continuously

    In most RV winter camping situations, it is better to keep the holding-tank valves closed and allow the tanks to fill normally.

    When it is time to dump, connect the sewer hose, empty the black tank, and then empty the gray tank. Make sure the hose drains completely before storing it.

    Keeping some volume in the tanks can be better than allowing small amounts of wastewater to trickle into a cold sewer hose, where they can freeze layer by layer.

    And as always, never leave the black-tank valve open during normal use. Doing so allows liquid to drain away while solids remain behind, which can produce serious holding-tank problems.

    Protect the Dump Valves Too

    Even if the tanks are enclosed, the dump valves or termination pipes may be exposed to cold air.

    Find out whether your RV’s tank-heating system also protects the valves and related plumbing. A heated tank does not necessarily mean every part of the wastewater system is protected.

    If freezing has already occurred, do not force a valve or strike frozen plastic components. You can break the handle, cable, valve body, or pipe.

    Instead, warm the affected area gradually using equipment designed for safe cold-weather use.

    Tip #5: Consider RV Skirting for Longer Stays

    Wind passing underneath an RV can remove heat quickly and make it harder to protect the floor, tanks, and plumbing.

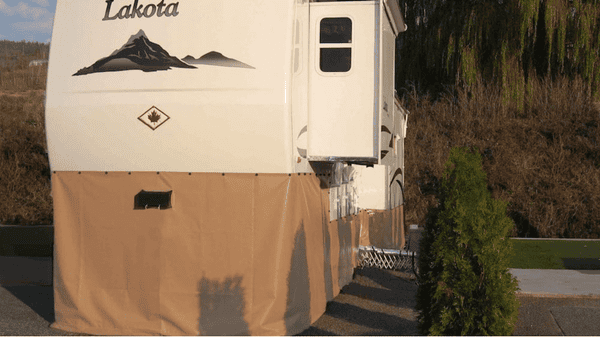
    RV skirting creates a barrier around the lower perimeter of the RV. This reduces airflow underneath and helps retain some of the warmth coming from the floor and heated compartments.

    RV skirting for winter RV camping

    Skirting is especially valuable if you will remain in one campsite for several weeks or months when you are winter RV camping.

    RV Skirting Options

    Commercial vinyl skirting systems are available for many RVs. Some attach using snaps, channels, hook-and-loop material, or other fasteners.

    Other RV owners use custom insulated panels or professionally fitted systems.

    Whatever material you choose, secure it well enough to withstand expected wind. Loose skirting can flap against the RV, come apart, or blow into nearby campsites.

    Keep furnace exhausts, water-heater vents, refrigerator vents, generator exhausts, and other required openings completely unobstructed. Skirting should never trap combustion exhaust or interfere with equipment ventilation.

    Also, check campground rules before installing it. Some parks restrict the materials or attachment methods that can be used.

    Tip #6: Use the RV Furnace and Supplemental Heat Wisely

    Your propane furnace is usually the heart of an RV’s cold-weather protection.

    It heats the living area, and in many four-season-capable RVs, it also sends warm air into the underbelly, holding-tank area, or plumbing compartments.

    Therefore, relying entirely on portable electric heaters can create an unexpected problem.

    The interior may remain comfortable while the unheated underbelly drops below freezing.

    Do Not Forget What the Furnace Protects

    Find out whether your furnace ducts supply heat to the tanks or water lines.

    If they do, run the furnace often enough to protect those areas. The exact thermostat setting will depend on your RV, outside temperature, wind, and how the ductwork is arranged.

    Remember that an RV furnace requires both propane and 12-volt electricity. The blower can consume a substantial amount of battery power, especially when the furnace runs frequently.

    So monitor your propane supply and battery state of charge. In very cold weather, running out of either one overnight can quickly become a serious situation.

    Using Portable Electric Space Heaters Safely

    A portable electric heater can supplement the furnace and reduce propane consumption when adequate shore power is available.

    However, space heaters draw a lot of electrical current. A typical 1,500-watt heater uses most of the capacity of a standard 15-amp circuit.

    Plug the heater directly into a suitable wall outlet unless its manufacturer specifically approves another arrangement. Avoid lightweight extension cords, power strips, and adapters.

    Keep the heater on a stable surface with plenty of clearance from curtains, bedding, furniture, clothing, pets, and other combustible materials.

    Choose a model with tip-over protection and overheat protection. Follow the manufacturer’s instructions, and do not leave a portable heater operating unattended or while you are asleep unless its instructions specifically allow that use.

    Also, avoid placing a portable electric heater in a damp wet bay or other confined compartment unless it is designed and approved for that exact purpose.

    Tip #7: Open Cabinets to Protect Interior Water Lines

    RV water lines often run through cabinets, under sinks, behind drawers, or along exterior walls.

    During very cold weather, those enclosed spaces may remain much colder than the main living area. Cabinet doors prevent warm interior air from reaching the plumbing.

    So when temperatures drop, open cabinet doors beneath sinks and anywhere water lines are located near exterior walls.

    This is especially helpful overnight, when outside temperatures are usually lowest.

    Be careful if children or pets are traveling with you. Opening cabinets can expose cleaning supplies, chemicals, sharp objects, or hot plumbing components, so move hazardous items before leaving the doors open.

    Also, learn where your water lines are located before winter arrives. A little preparation makes it much easier to identify the most vulnerable areas when a freeze warning is issued.

    Control Condensation While Keeping the RV Warm

    Cold-weather RV camping involves more than producing heat.

    People create moisture by breathing, showering, cooking, and drying wet clothing. When warm, moist interior air meets cold windows and walls, condensation forms.

    If that moisture remains trapped, it can lead to mildew, mold, odors, stains, and damage to walls, cabinets, mattresses, and window frames.

    Run exhaust fans while cooking and showering. However, make sure snow or ice is not preventing the exterior vent covers from opening.

    You may also need to crack a roof vent or window slightly, even though allowing cold air inside seems counterproductive.

    A small dehumidifier can help when shore power is available. Moisture-absorbing products may be useful in closets and cabinets, but they generally cannot control all the humidity produced in an occupied RV.

    Check behind mattresses, inside closets, around windows, and behind insulated coverings regularly. These are common areas for hidden condensation to collect.

    Carry a Cold-Weather Backup Plan

    Even with good preparation, equipment can fail.

    A furnace control board can stop working, propane can run out, campground power can fail, or temperatures can fall lower than forecast.

    So carry enough propane for the conditions and know where you can obtain more. Maintain your batteries and have a way to keep them charged if shore power is interrupted.

    Test your smoke, carbon-monoxide, and propane detectors before every cold-weather trip. Never use an unvented outdoor heater, grill, stove, or generator to heat the RV.

    Keep a safe alternative location in mind as well. If the heating system fails during dangerously cold weather, staying in a hotel or moving to a warmer area may be the wisest choice.

    An RV has wheels, and sometimes using them is the best cold-weather strategy available.

    Frequently Asked Questions About Winter RV Camping

    Can you use an RV during the winter?

    Yes, many RVs can be used during winter if they are properly prepared. However, an RV’s cold-weather capability depends on its insulation, plumbing design, heating system, enclosed underbelly, tank protection, and the severity of the weather.

    What temperature will RV pipes freeze?

    Water freezes at 32 degrees Fahrenheit, but RV pipes do not necessarily freeze as soon as the outside temperature reaches that point. Wind, exposure, insulation, duration, and whether the pipes receive heat all affect the risk.

    Do I need a four-season RV for winter camping?

    Not necessarily for occasional mild cold weather. However, a four-season-capable RV is a much better choice for repeated or extended camping in freezing temperatures.

    How can I keep my RV water hose from freezing?

    Use a heated potable-water hose according to its manufacturer’s instructions, and protect the faucet and connections too. Another option is to fill the freshwater tank as needed, disconnect and drain the hose, and use the RV’s water pump.

    Should I leave my sewer hose connected during winter?

    It is generally better not to leave it exposed with wastewater standing inside. Allow the tanks to fill, connect the hose when needed, dump the tanks, drain the hose completely, and store it.

    Does RV skirting really help in winter?

    Yes. Skirting reduces wind movement underneath the RV and can help the floor, tanks, and plumbing areas retain heat. Its effectiveness depends on the material, installation, wind, and outside temperature.

    Can I heat my RV entirely with electric space heaters?

    You may be able to keep the interior warm, but doing so can leave tanks and plumbing areas unprotected if they depend on heat from the propane furnace. Learn how your particular RV’s heating system is designed before relying only on electric heaters.

    Should I leave cabinet doors open when temperatures fall?

    Yes, opening cabinets can allow warm interior air to reach water lines near exterior walls. Just make sure hazardous products are moved where children and pets cannot reach them.

    How do I reduce condensation during winter RV camping?

    Use exhaust fans while cooking and showering, provide limited ventilation, dry wet items promptly, and consider using a dehumidifier. Check windows, closets, mattresses, and areas behind insulation for trapped moisture.

    Conclusion

    Winter RV camping can be a wonderful experience.

    Campgrounds are often quieter, destinations are less crowded, and a campfire feels especially inviting when the air is cold. But enjoying those advantages requires more preparation than camping in mild weather.

    Start with an RV that is reasonably capable of handling the expected temperatures. Add insulation where heat escapes, protect the freshwater and wastewater systems, consider skirting, and operate the furnace often enough to warm vulnerable plumbing areas.

    Use supplemental heaters carefully, open cabinets around water lines, and keep condensation under control.

    Most importantly, monitor the weather and know the limits of your particular RV. If conditions become more severe than your RV can safely handle, be willing to change your plans.

    With the right preparation, you can stay comfortable, protect your RV, and enjoy safe and happy travels throughout much more of the year.