
Lithium RV Batteries: The Pros, The Cons, And The Myths

Lithium RV batteries have become one of the most talked-about upgrades in the RV industry. However, the amount of conflicting information online has left many RV owners unsure about what to believe.

On one side, you have people who say every RVer should immediately replace their lead-acid batteries with lithium. But on the other side, some claim that lithium batteries are dangerous and could suddenly catch fire or explode inside an RV.

As usual, the truth is somewhere between those extremes.

Lithium RV batteries offer some very impressive advantages, especially for boondockers and RVers with solar power. However, they cost more initially, require the right supporting equipment, and may not provide enough benefit for someone who spends almost every night connected to shore power.

If you are still comparing your options, my guide to the three main RV house battery choices explains the differences between flooded lead-acid, AGM, and lithium batteries.

So let’s look at the pros and cons of lithium RV batteries, clear up some common myths, and determine whether they make sense for your style of RV travel.

Lithium RV batteries

What Kind of Lithium Batteries Are Used in RVs?

When RVers talk about lithium batteries, they are usually referring to lithium iron phosphate batteries, commonly abbreviated as LiFePO4 or LFP.

That distinction is important because not all lithium battery chemistries are the same. The lithium-ion batteries used in some consumer electronics and electric vehicles may have different performance and safety characteristics.

LiFePO4 batteries are popular in RVs because the chemistry is relatively stable, delivers a long cycle life, and works well for deep-cycle applications. Quality RV lithium batteries also include a battery management system, or BMS, that monitors and protects the battery.

A BMS can provide protection against excessive voltage, low voltage, overcurrent, short circuits, and unsafe temperatures. However, it does not replace proper wiring, fusing, installation, or charging equipment.

The Advantages of Lithium RV Batteries

There are many reasons why RV owners are upgrading from flooded lead-acid or AGM batteries to LiFePO4 batteries.

Lithium Batteries Weigh Much Less

One of the first benefits you will notice is the weight difference.

A typical 100-amp-hour flooded lead-acid battery may weigh 60 to 70 pounds. Meanwhile, a comparable 100-amp-hour LiFePO4 battery commonly weighs between 25 and 35 pounds.

For example, the current Battle Born 100Ah battery weighs about 31 pounds. So replacing two heavy lead-acid batteries with lithium could remove 60 pounds or more from your RV.

That can be a meaningful benefit in a smaller travel trailer or motorhome with limited cargo carrying capacity. And because lithium provides more usable energy per rated amp-hour, you may not need as many batteries to obtain the power you need.

More of the Rated Capacity Is Usable

Lead-acid batteries generally last longer when they are not repeatedly discharged below approximately 50% state of charge.

So a 100-amp-hour flooded lead-acid battery is often treated as providing around 50 amp-hours of regularly usable capacity. Deeper discharges are possible, but doing so repeatedly can shorten battery life considerably.

Many LiFePO4 batteries allow 80% to 100% of their rated capacity to be used. That means a 100-amp-hour lithium battery may provide nearly twice the practical usable energy of a similarly rated lead-acid battery.

However, that does not mean you should intentionally drain a lithium battery completely every day. Depth of discharge still affects cycle life, and leaving any battery deeply discharged can eventually damage it.

Lithium Batteries Can Recharge Faster

Lithium batteries can usually accept a higher charging current than lead-acid batteries.

A typical 100Ah lead-acid battery may accept around 20 to 30 amps during bulk charging, while some 100Ah LiFePO4 batteries can accept 50 amps or more. The actual limit depends on the battery and its BMS.

This faster charge acceptance can reduce generator run time and help RVers make better use of limited solar-producing hours.

However, lithium batteries will only charge faster if the converter, solar controller, alternator-charging system, cables, and other equipment can safely supply the additional current.

They Maintain Voltage Under Load

Lead-acid battery voltage gradually drops as the battery discharges. And under a heavy load, that voltage can sag enough to cause an inverter or other appliance to shut down.

Lithium batteries maintain a much flatter voltage throughout most of their discharge cycle. So lights, pumps, inverters, and other 12-volt equipment can operate more consistently.

This makes LiFePO4 RV batteries particularly useful when powering appliances through an inverter.

Very Little Routine Maintenance Is Required

Flooded lead-acid batteries require regular inspection. Owners must monitor electrolyte levels, add distilled water when needed, clean corrosion from the terminals, and make sure the battery compartment remains ventilated.

LiFePO4 batteries do not require watering or periodic equalization. And terminal corrosion is generally much less of a problem.

However, maintenance-free does not mean inspection-free. Battery cables, connections, fuses, mounting hardware, and the battery compartment should still be checked periodically.

No Off-Gassing During Normal Operation

Flooded lead-acid batteries can release hydrogen and oxygen while charging. Hydrogen is flammable, so these batteries must be installed in a properly ventilated compartment away from ignition sources.

LiFePO4 batteries do not normally release hydrogen gas while charging. As a result, many models can be installed inside an RV when the battery manufacturer permits it.

But that does not mean a lithium battery can be placed just anywhere. It must be securely mounted, protected from excessive heat, moisture, physical damage, and short circuits, and installed according to the manufacturer’s instructions.

Lithium Batteries Usually Last Longer

Quality LiFePO4 batteries are commonly rated for approximately 3,000 to 5,000 cycles, although the actual number depends on the battery, depth of discharge, temperature, charging practices, and how the manufacturer defines the end of its useful life.

By comparison, many conventional lead-acid batteries deliver several hundred cycles, although premium lead-acid designs can do better when properly maintained.

So it is reasonable to expect a quality lithium RV battery to last much longer than a typical flooded lead-acid battery. However, saying every lithium battery will last exactly ten times longer is too broad because battery quality and usage vary substantially.

Excellent for Solar and Partial Charging

Solar power is naturally inconsistent. Clouds, shade, weather, and the position of the sun cause charging output to rise and fall throughout the day.

LiFePO4 batteries handle partial-state-of-charge operation much better than most lead-acid batteries. Lead-acid batteries should regularly return to a full charge because remaining partially discharged can promote sulfation and reduce capacity.

That makes lithium batteries a very good match for RV solar systems, particularly when the battery bank may receive an incomplete charge on cloudy days.

The Disadvantages of Lithium RV Batteries

Lithium batteries have many advantages, but they are not the perfect solution for every RVer.

The Initial Cost Is Higher

Price continues to be the largest disadvantage.

Depending on capacity, features, certifications, warranty coverage, and brand, a 100Ah LiFePO4 battery can cost anywhere from a few hundred dollars to nearly $1,000. Heated batteries and batteries with advanced monitoring generally cost more.

For comparison, Battle Born currently lists its standard 100Ah 12-volt battery at $799 during a promotion, with a regular listed price of $949. Its published specifications include a 31-pound weight, 100% usable depth of discharge, and a rated cycle life of 3,000 to 5,000 cycles. Battle Born 100Ah battery specifications

Battleborn lithium RV batteries

However, price alone does not determine quality. You should also compare the BMS, continuous-current rating, low-temperature protection, certifications, warranty, technical support, and the reputation of the seller.

A Lithium Conversion May Require Other Upgrades

Changing from lead-acid to lithium is not always as simple as replacing one battery with another.

LiFePO4 batteries require a compatible charging profile. An older RV converter may charge the battery only partially, or it may use charging and equalization settings that are inappropriate for lithium.

If these two devices are confusing, I also explain the difference between an RV converter and inverter and the job each one performs.

Your solar charge controller must also have the correct lithium settings. And if the RV charges the house batteries from the engine alternator, a DC-to-DC charger may be needed to control the current and protect both the alternator and battery bank.

Depending on your system, you may also need new battery cables, properly sized fuses, busbars, a disconnect switch, or a shunt-based battery monitor.

So before buying lithium batteries, consider the cost of the complete conversion rather than looking only at the battery price.

Cold-Weather Charging Requires Special Attention

LiFePO4 batteries can usually discharge and provide power below freezing. However, charging them when the battery cells are too cold can cause permanent internal damage.

The exact temperature limit varies by manufacturer. Battle Born currently advises against charging below approximately 25 degrees Fahrenheit unless the battery has internal heating, while some Victron batteries require a cell temperature above 41 degrees.

A quality BMS should prevent charging when the cells are outside the manufacturer’s safe temperature range. However, not every inexpensive battery provides reliable low-temperature protection.

RVers who camp in cold weather can install the battery in a protected interior compartment or choose a heated lithium battery. Battle Born provides additional guidance about LiFePO4 temperature limits.

A BMS Can Disconnect the Battery

A battery management system is an important safety feature, but owners need to understand how it works.

If voltage, temperature, or current moves outside the permitted range, the BMS may disconnect the battery. That protects the cells, but it can also cause the RV’s 12-volt power to shut off without much warning.

A Battleborn Battery Management System

This is especially important when operating a high-powered inverter. The total continuous and surge current must stay within the limits of the batteries and their BMS units.

State of Charge Is Harder to Estimate by Voltage

The flat voltage curve that helps lithium batteries operate appliances consistently also makes their state of charge difficult to estimate with a basic voltage display.

A lithium battery can remain near its normal voltage through much of the discharge cycle and then drop quickly near the end.

So a shunt-based battery monitor is strongly recommended. It measures current entering and leaving the battery bank and provides a much more useful estimate of the remaining capacity.

Common Lithium RV Battery Myths

Now let’s clear up some of the misinformation surrounding lithium RV batteries.

Myth 1: Lithium RV Batteries Commonly Explode

Any battery stores a substantial amount of energy, and any improperly manufactured, damaged, overcharged, short-circuited, or incorrectly installed battery can fail.

However, LiFePO4 chemistry is more thermally and chemically stable than several other lithium-ion chemistries. Quality batteries add a BMS and other protective features to reduce the risk further.

Flooded lead-acid batteries have their own hazards. They contain corrosive acid and can release flammable hydrogen during charging, which is why proper ventilation is essential.

So the correct conclusion is not that one type of battery has no risk. Instead, choose a battery from a reputable manufacturer, look for appropriate independent testing and certifications, and make sure the entire system is correctly installed and protected.

Myth 2: Lithium Batteries Cannot Be Used in Cold Weather

Lithium batteries can usually discharge and power an RV below freezing.

The main restriction involves charging. If the internal cells are below the manufacturer’s minimum charging temperature, the BMS should stop charging until the battery warms up.

A heated lithium battery or temperature-controlled interior installation can solve that problem for many cold-weather RVers.

Myth 3: Lithium Batteries Are Always Too Expensive

Lithium batteries cost more initially, but the purchase price is only one part of the calculation.

Their longer cycle life, greater usable capacity, reduced weight, faster charging, and lack of routine maintenance can make them economical over many years of frequent use.

However, an occasional camper may never cycle the batteries often enough to recover the higher initial cost. So lithium is not automatically the least expensive answer for everyone.

Myth 4: Every RVer Needs Lithium Batteries

Lithium has become so popular that some RV owners feel as though their electrical system is outdated without it.

But the right battery depends on how you camp.

If you spend most nights connected to shore power and use the batteries mainly for lights, the water pump, and brief overnight stops, a quality lead-acid or AGM battery bank may still serve you very well.

Who Benefits Most From Lithium RV Batteries?

Lithium batteries make the most sense for RVers who regularly rely on stored electrical power.

Boondockers and Dry Campers

Boondockers can benefit from the greater usable capacity, faster generator charging, and ability to handle partial solar charging.

Some RVers combine solar power with an inverter generator while boondocking so they can recharge their battery bank even when sunlight is limited.

And because lithium batteries weigh less, owners can install a larger usable battery bank without consuming as much cargo capacity.

RVers With Large Solar Systems

Solar and lithium work very well together when the charge controller is properly configured.

Lithium batteries can accept strong solar output quickly, and they tolerate the changing charging conditions caused by clouds and shade better than conventional lead-acid batteries.

RVers Who Use Large Inverters

If you want to power a microwave, coffee maker, residential refrigerator, or other significant load from an inverter, lithium batteries can provide more stable voltage and higher current.

Battery capacity becomes especially important when powering an RV refrigerator off-grid because compressor-style refrigerators require a dependable source of electricity.

However, the battery bank, BMS, inverter, wiring, and fuses must all be correctly sized for the load.

Owners Concerned About Weight

Lithium can be especially helpful in travel trailers, truck campers, camper vans, and smaller motorhomes with limited cargo capacity.

Reducing battery weight does not increase the RV’s official cargo carrying capacity, but it leaves more of that capacity available for other items.

Who May Not Need Lithium Batteries?

Lithium may not be necessary if you camp almost exclusively in RV parks with full hookups.

In that situation, the converter supplies most of your 12-volt power while also maintaining the batteries. So you may rarely take advantage of lithium’s deeper usable capacity or rapid charging.

Lead-acid can also remain a practical choice for someone who camps only a few weekends each year and has a limited upgrade budget.

The important point is to buy the battery system that fits your actual needs, not the system that happens to be receiving the most attention online.

How to Choose the Best Lithium Battery for Your RV

Do not judge a lithium battery by price and advertised amp-hours alone.

Look for a dependable battery management system with protection against high and low voltage, overcurrent, short circuits, and unsafe temperatures. Also verify the continuous-current rating, especially if you plan to operate an inverter.

Check for relevant independent testing and certifications, along with clear installation documentation and accessible technical support. A long warranty has little value if the company is difficult to reach or may not be around when you need help.

You should also confirm whether the battery can be connected in series or parallel, how many batteries the manufacturer allows in a bank, and whether batteries of different ages or capacities can be combined.

And if you camp in freezing weather, choose a battery with dependable low-temperature cutoff protection or internal heating.

Is Battle Born a Good RV Lithium Battery?

Battle Born is one premium brand worth considering. I am not affiliated with the company, and I am not being paid or compensated to recommend it.

The company has a long-standing presence in the RV community, provides detailed technical documentation, and builds its 100Ah batteries with an internal BMS. Its batteries also carry published cycle-life, temperature, current, and charging specifications.

However, Battle Born is not the only acceptable choice. Other manufacturers offer quality LiFePO4 RV batteries, so compare specifications, testing, warranty support, and total system cost before making a decision.

Planning an RV Lithium Battery Upgrade

Before ordering batteries, determine how much electricity you actually use each day.

Before making major changes, it helps to spend some time understanding your RV’s electrical system and how its batteries, converter, inverter, solar equipment, and generator work together.

List your 12-volt appliances and anything you intend to power through an inverter. Then estimate daily amp-hour consumption and build a battery bank with enough reserve capacity.

Next, verify the following parts of your RV electrical system:

  • Converter or inverter-charger
  • Solar charge controller
  • Alternator-charging circuit
  • Battery cables and connections
  • Main battery fuse
  • Disconnect switch
  • Battery monitor
  • Battery mounting location

If you are uncertain about any part of the conversion, consult a qualified RV electrical technician. Lithium batteries can deliver very high current, so improper cable sizing or circuit protection can create a serious hazard.

Frequently Asked Questions About Lithium RV Batteries

Are lithium RV batteries safe?

Quality LiFePO4 batteries are generally safe when properly manufactured, installed, charged, and protected.

Choose a reputable product with an effective BMS, use correctly sized cables and fuses, and follow the manufacturer’s installation requirements.

Can I replace my lead-acid RV battery with lithium?

Possibly, but first verify that the converter, solar controller, alternator-charging system, battery monitor, cables, and fuses are compatible.

Some newer RVs already have a lithium charging mode, while older RVs may require several upgrades.

Can lithium RV batteries be used below freezing?

Most can continue discharging below freezing, although available capacity may decrease.

However, they should not be charged below the manufacturer’s minimum temperature unless they have an approved internal heating system.

Do lithium RV batteries need ventilation?

LiFePO4 batteries do not release hydrogen during normal charging like flooded lead-acid batteries do.

Many can therefore be installed inside an RV, but only in a secure location permitted by the manufacturer and protected from heat, moisture, physical damage, and short circuits.

How long do lithium RV batteries last?

Quality LiFePO4 batteries are often rated for 3,000 to 5,000 cycles, and some manufacturers advertise even more.

Actual life depends on depth of discharge, temperature, charging practices, battery quality, storage conditions, and usage.

Can I mix lithium and lead-acid batteries?

Lithium and lead-acid batteries should not be connected directly together as one house battery bank because their charging requirements and voltage characteristics are different.

They may be used in separate, electrically isolated battery systems when the charging and control equipment is specifically designed for that arrangement.

Are lithium batteries worth it for occasional campers?

They may not be.

If you camp infrequently and normally have shore power, a well-maintained lead-acid or AGM bank could provide everything you need for much less initial expense.

Conclusion: Do You Really Need Lithium RV Batteries?

Lithium RV batteries offer more usable capacity, less weight, faster charging, stable voltage, minimal maintenance, and a much longer potential service life than conventional flooded lead-acid batteries.

Those advantages make LiFePO4 batteries especially attractive for boondockers, solar users, inverter users, and RVers who depend heavily on battery power.

However, lithium batteries cost more initially and may require upgrades to the converter, solar controller, alternator-charging system, cables, fuses, and monitoring equipment.

So lithium is not automatically the best choice for every RV owner.

If you spend most of your time in campgrounds connected to shore power, a quality lead-acid or AGM battery bank may continue to serve you very well. But if you regularly camp off-grid and want more usable energy with less weight and faster charging, lithium batteries deserve serious consideration.

The goal is not to buy lithium because everyone else is doing it. The goal is to choose the battery system that safely and reliably supports the way you actually use your RV.

LiquidSpring Motorhome Suspension: Is It Worth the Cost?

So is the LiquidSpring motorhome suspension upgrade worth it or not?

Well, gas-powered motorhomes offer several important advantages.

They generally cost less than diesel pushers, and can be serviced by more repair facilities.

They also use familiar Ford or Chevrolet commercial chassis that have proven themselves over many years.

But ride quality and handling can be a different story.

In fact, many gas motorhome owners complain about a harsh ride, excessive body roll, steering corrections, wind sensitivity, and the push-and-pull effect caused by large trucks passing on the highway.

And although several aftermarket suspension upgrades can help, they don’t completely change the basic suspension under the RV.

But LiquidSpring motorhome suspension upgrades take a much different approach.

You can watch my video on LiquidSpring by clicking on the image below.

LiquidSpring motorhome suspension

Instead of adding another component to the factory suspension, it replaces the original suspension with a computer-controlled system that continuously responds to driving conditions.

Now I had heard many positive reports about LiquidSpring, but I wanted to experience it for myself.

So at the 2024 Hershey RV Show, I took test drives in two very different motorhomes equipped with the system.

And in this article, I’ll explain how LiquidSpring motorhome suspension works and what I noticed during those test drives.

And I’ll also discuss which motorhomes may qualify for the system, and whether this expensive motorhome suspension upgrade could make sense for you.

Quick Answer: Is LiquidSpring Suspension Worth It?

A LiquidSpring motorhome suspension can be worth considering if you own a motorhome that you genuinely love, but are unhappy with its ride and handling.

In fact, it can dramatically improve ride comfort, reduce body roll, and give the driver more control over how soft or firm the suspension feels.

However, an aftermarket installation may cost around $30,000, based on the estimate I received at the 2024 Hershey RV Show.

So it makes the most sense for owners who can afford the upgrade and plan to keep their RV for several years.

And also for those who want a more complete solution than shocks, sway bars, steering stabilizers, or other less expensive products can provide.

What Is A LiquidSpring Motorhome Suspension?

LiquidSpring is a computer-controlled suspension system that replaces the factory suspension on compatible motorhome chassis.

The components of a LiquidSpring system

It uses a compressible fluid and electronic controls to adjust the suspension’s response to changing road and driving conditions.

So this isn’t simply another shock absorber, helper spring, or stabilizer added to the existing suspension.

It is a much more extensive conversion that changes how the RV rides and handles.

And the driver can even select the desired suspension setting from a control module installed near the driver’s seat.

The LiquidSpring suspension control module

Meanwhile, the system’s computer continuously monitors the motorhome and adjusts the suspension while the RV is moving.

It’s also important to realize that LiquidSpring technology has already been used in demanding commercial and emergency-vehicle applications.

That matters because motorhome owners understandably want to know whether an advanced suspension system has been tested beyond the RV market.

How the LiquidSpring Motorhome System Works

A conventional motorhome suspension uses steel springs, shocks, sway bars, and other mechanical components to support the vehicle and control movement.

Those components are selected to handle the chassis’s expected weight and operating conditions.

But a motorhome can experience many different conditions during the same trip.

So a suspension setting that feels comfortable on a straight, smooth highway may feel too soft on a winding road or during strong crosswinds.

And a LiquidSpring motorhome suspension is designed to adjust to those changing conditions.

Its onboard computer monitors information such as vehicle speed, steering input, braking, road movement, and ride height many times per second.

Then the system changes the suspension response as needed.

For example, the motorhome can ride more softly when traveling straight on a relatively smooth road.

But when the driver turns, brakes, encounters a crosswind, or enters another situation requiring greater stability, the system can firm the suspension.

And that ability to balance comfort with handling is one of the system’s greatest advantages.

The Driver Control Module

A control module is installed within reach of the driver. And it allows the driver to select from three suspension settings while traveling.

The controls are pretty straightforward, so you don’t need to understand all the technology operating in the background.

You simply choose the setting that best fits the driving conditions.

However, the driver is not manually controlling every suspension adjustment.

Because the computer continues making rapid automatic changes within the selected mode.

Automatic Ride-Height Control

The system also maintains and controls the motorhome’s ride height.

And this can help keep the coach at its intended operating position despite changes in weight distribution and driving conditions.

Maintaining the correct ride height can contribute to more predictable handling.

And it may also reduce some of the leaning and excessive movement that motorhome owners experience with traditional suspensions.

Why Gas Motorhomes Can Be Difficult to Drive

Most gas motorhomes are built on commercial truck or van chassis.

These chassis are strong, dependable, and capable of carrying substantial weight, which makes them a logical foundation for an RV.

However, they were not originally designed to deliver luxury-car ride quality.

In fact, a commercial chassis needs to support a heavy load, so the suspension may feel stiff and unforgiving.

So when an RV manufacturer adds a tall, wide motorhome body, the resulting vehicle can also be affected by body roll, crosswinds, uneven road surfaces, and passing trucks.

Ford F-53 Class A Motorhomes

The Ford F-53 chassis has been widely used under gas-powered Class A motorhomes.

A Ford F-53 chassis

And it is capable and reliable, but owners frequently look for ways to improve its ride, steering feel, and resistance to sway.

Some F-53 motorhomes ride better than others because wheelbase, weight distribution, tire pressure, coach construction, and loading all affect the driving experience.

But even a properly loaded motorhome may still feel like the commercial vehicle it is.

Ford E-Series Class C Motorhomes

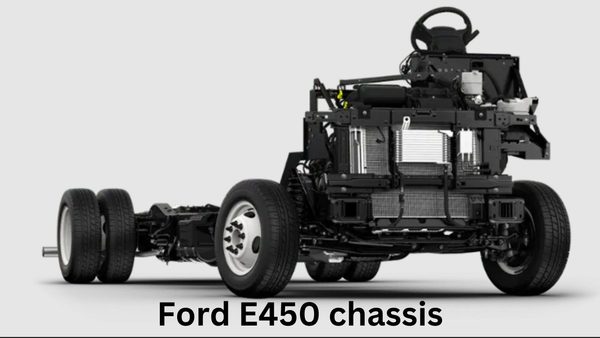
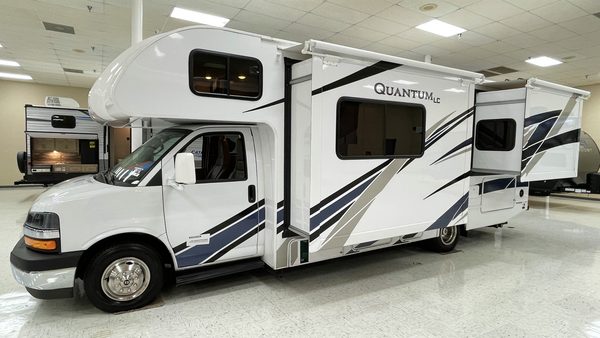
Many Class C motorhomes are built on Ford E-350 or E-450 cutaway chassis.

A Ford E450 chassis

And these vehicles may feel more familiar to drive than a large Class A motorhome, but ride and handling complaints are still common.

The rear suspension can feel harsh, especially when the motorhome travels over bridge joints, potholes, or uneven pavement.

And depending on the coach design and weight distribution, the driver may also experience wandering or instability.

Super C Motorhomes

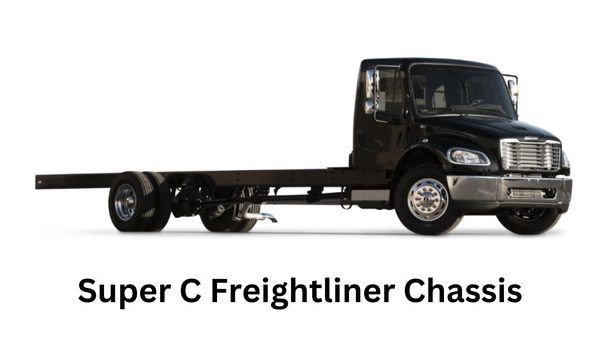
A Super C motorhome is built on a heavier commercial truck chassis.

And this provides substantial towing and weight capacity, but those capabilities can also come with a firmer ride.

In addition, some Super C models are also designed for rough-road or off-road use.

And as a result, the suspension may feel particularly stiff during ordinary highway travel.

Less Expensive Motorhome Suspension Upgrades

But a LiquidSpring motorhome suspension isn’t the only way to improve a motorhome’s ride and handling.

In fact, most RV owners begin with less expensive upgrades, and that is usually a sensible approach.

The right combination depends on the chassis and the specific problem you are trying to solve.

So it is important to diagnose the complaint before purchasing parts.

Upgraded Shock Absorbers

Better shock absorbers can improve the control of suspension movement.

They may help reduce bouncing, porpoising, and repeated movement after the motorhome crosses a dip or uneven section of pavement.

However, shocks do not carry the motorhome’s weight or completely change the suspension design.

So they may improve certain behaviors without solving every ride and handling complaint.

Heavier Sway Bars

Upgraded sway bars can also reduce body roll as the motorhome turns or encounters uneven road surfaces.

And they can also make the coach feel more stable when wind or passing trucks push against its large sidewalls.

But a stiffer sway bar can sometimes transfer more movement from one side of the suspension to the other.

So there can be a tradeoff between roll control and ride comfort.

Steering Stabilizers

A steering stabilizer may help the motorhome track more consistently and return the steering toward center.

And it can also provide additional control if a front tire fails.

However, a stabilizer should not be used to hide an alignment problem, worn steering components, incorrect tire pressure, or improper weight distribution. Those issues should be corrected first.

Rear Track Bars

A rear track bar helps control side-to-side movement between the chassis and rear axle.

And this can be useful when the driver feels as though the rear of the motorhome is moving sideways and requiring constant steering correction.

Track bars can make a noticeable improvement in the right situation.

But once again, they address a particular kind of movement rather than replacing the entire suspension.

SumoSprings and Other Helper Springs

Helper springs can provide additional support and may improve stability, reduce sag, and limit excessive body movement.

Also, they are relatively simple compared with a complete suspension replacement.

And for many motorhome owners, combining carefully chosen components can produce a worthwhile improvement at a much lower cost than a LiquidSpring motorhome suspension.

Less expensive motorhome suspension upgrades

However, these upgrades generally improve the factory suspension one piece at a time.

And LiquidSpring takes a more comprehensive approach by replacing it.

My LiquidSpring Test-Drive Experience

At the 2024 Hershey RV Show, I arranged to test-drive two motorhomes with Wayne Wells, who was LiquidSpring’s national product manager at that time.

Because I wanted to try the system in motorhomes known for having firm or challenging suspensions.

And the first one was a Nexus Super C with off-road capabilities.

The Nexus Super C that I tested

Of course, that kind of motorhome needs a strong suspension, but the result can be a stiff ride on normal paved roads.

The second was a Winnebago Adventurer gas-powered Class A motorhome.

The Winnebago Adventurer that I test drove

And this gave me a chance to experience LiquidSpring on the Ford F-53 chassis used by many Class A owners.

And after driving both motorhomes, I was impressed.

Because the difference was not a minor change that required imagination to notice.

Instead, the system provided a substantial improvement over the kind of factory ride and handling normally associated with these chassis.

Changing the Ride While Driving

One of the most impressive features was the ability to change the suspension setting at the touch of a button.

I could select a softer or firmer ride without stopping the motorhome.

So that means the driver doesn’t have to accept one permanent suspension compromise.

You can choose more comfort while cruising and then select greater firmness when driving conditions require additional control.

Of course, no suspension can eliminate every bump, gust of wind, or movement from a large vehicle.

But LiquidSpring made both motorhomes feel more composed and comfortable during my test drives.

My Independent Opinion

Now I am not affiliated with LiquidSpring in any way, and the company did not pay me for my review.

I just wanted to experience the system because I had heard so many positive reports about it.

And after the test drives, I understood why owners speak so highly of the technology.

So based on what I experienced, I can say that a LiquidSpring motorhome suspension delivers a meaningful improvement in both ride quality and handling.

LiquidSpring Comfort, Normal, and Sport Modes

But the system also offers three driver-selectable settings commonly identified as Comfort, Normal, and Sport.

And each one changes the balance between a soft ride and firmer handling.

Comfort Mode

Comfort mode provides the softest ride of the three settings.

So it’s useful when you are cruising on a relatively straight road and want the suspension to absorb more of the pavement’s harshness.

In fact, the sensation reminded me more of the softer ride people often associate with a diesel pusher.

However, the motorhome’s size, chassis, tires, loading, and road conditions will still affect the final result.

Normal Mode

Normal mode provides a middle ground between maximum comfort and maximum firmness.

And it may be the setting many drivers use for ordinary travel.

The system still responds automatically to steering, braking, and road conditions though.

So Normal mode doesn’t mean the suspension stops adjusting.

Sport Mode

Sport mode creates a firmer suspension response.

And it can be especially useful on winding roads, in windy conditions, or when frequent truck traffic is affecting the motorhome.

The firmer setting helps control body movement and makes the RV feel more stable.

And because the setting is available from the driver’s seat, you can select it as conditions change.

How Much Does LiquidSpring Cost?

Cost is the biggest obstacle for most motorhome owners.

And when I asked about aftermarket installation at the 2024 Hershey RV Show, I was told to expect a price of approximately $30,000.

However, that figure should be viewed as a general estimate from that time, not a guaranteed current price.

The actual cost can vary with the chassis, installation facility, labor rates, system configuration, and any additional work the motorhome requires.

So before making a decision, request a written estimate for your exact RV and chassis.

Aftermarket LiquidSpring installers

You should also ask what is included in the price, how long the installation will take, and what warranty coverage applies.

Factory Installation May Cost Less

Some RV manufacturers have offered a LiquidSpring motorhome suspension as a factory-installed option on selected motorhomes too.

And a factory installation may cost less than converting an RV after it has already been built.

Availability can change by manufacturer, model, and model year, though.

So if you are ordering a new motorhome, ask both the RV manufacturer and dealer whether LiquidSpring is available for that particular model.

Buying it as a factory option may also simplify financing because the cost can potentially be included in the RV purchase.

However, financing an expensive option means paying interest on it, so consider the total long-term cost.

Which Motorhomes Can Use LiquidSpring?

LiquidSpring systems have been developed for several motorhome chassis, but availability depends on the exact chassis configuration and model year.

And a system being available for one version of a chassis does not automatically mean it will fit every RV built on that platform.

Applications have included certain versions of the following chassis:

  • Ford F-53 Class A chassis
  • Ford E-350 and E-450 Class C chassis
  • Chevrolet and GMC 3500 and 4500 Class C chassis
  • Ford F-550 and F-600 Super C chassis
  • Ram 5500 chassis
  • Chevrolet Silverado 5500 chassis
  • International MV chassis

Because product offerings can change, confirm compatibility directly with LiquidSpring or an authorized installer.

Provide the RV’s year, make, model, chassis information, gross vehicle weight rating, wheelbase, and vehicle identification number when requesting confirmation.

And don’t schedule an installation based only on a general online chassis list.

The installer needs to verify that the system is approved for your specific motorhome.

Who Should Consider LiquidSpring?

LiquidSpring is not going to make financial sense for every motorhome owner.

But for the right person, it may solve one of the most frustrating parts of RV travel.

Owners Who Love Their Current Motorhome

Suppose you like your motorhome’s floor plan, storage, features, size, and overall condition.

And you want to keep it, but you dislike how it rides and handles.

Well, in that situation, spending money to improve the existing RV may be preferable to trading it.

Because a newer motorhome could cost far more, and there is no guarantee that its factory suspension would satisfy you.

Owners Planning to Keep Their RV for Years

And the longer you keep the motorhome, the more opportunities you have to benefit from the upgrade.

But a $30,000 suspension installed shortly before selling the RV may be difficult to justify.

However, if you expect to keep and travel in the coach for many years, you can spread the value of greater comfort over a longer period.

That doesn’t make the system inexpensive, but it may make the investment easier to justify.

Drivers Troubled by Sway or Harshness

Some owners are physically exhausted after driving a motorhome that requires constant steering correction.

And others find that a rough ride causes fatigue or makes travel uncomfortable for passengers.

So an improvement in ride and handling may provide more than simple luxury.

It could make the motorhome more enjoyable to use and encourage owners to continue traveling.

New-RV Buyers Considering a Gas Motorhome

LiquidSpring may also interest shoppers who prefer the price and practical advantages of a gas motorhome but want better ride quality.

It could allow them to buy the gas coach they prefer without moving all the way up to a diesel pusher.

However, compare the complete prices carefully.

Once an expensive suspension option and other upgrades are added, the difference between the gas coach and competing motorhomes may become smaller.

Who May Not Need LiquidSpring?

If you are generally satisfied with how your motorhome drives, there may be no reason to spend this kind of money.

An expensive upgrade should solve a real problem, not simply give you another feature.

And LiquidSpring may also be difficult to justify if you use the RV only a few times each year, plan to sell it soon, or are already close to the chassis’s weight limitations.

Also, if the handling complaint comes from incorrect tire pressure, poor alignment, overloading, worn components, or improper weight distribution, those problems need to be corrected first.

A motorhome should be weighed at all four corners when possible, and tire pressure should be set according to the tire manufacturer’s load-and-inflation information.

And the chassis, suspension, steering, tires, and alignment should also be inspected before assuming that a major suspension conversion is the answer.

LiquidSpring Versus a Diesel Pusher

Of course, diesel pushers are known for smooth ride quality because many use air suspension, longer wheelbases, heavier chassis, and rear-mounted engines.

But they also tend to cost more to purchase and can be more expensive to maintain.

So a gas motorhome with LiquidSpring may provide a useful middle path.

Because you can retain the gas-powered chassis while gaining a much more sophisticated suspension.

However, it will not turn a gas Class A motorhome into a diesel pusher in every respect.

Engine location, noise, braking systems, weight capacity, drivetrain design, chassis construction, and overall handling characteristics will still be different.

So the goal should not be to create a diesel motorhome disguised as a gas coach.

The goal is to make a compatible gas motorhome more comfortable and controlled.

What to Consider Before Installation

Before spending tens of thousands of dollars on any suspension system, take enough time to verify that it is the right solution.

First, have the motorhome inspected for worn steering and suspension components.

Also confirm its alignment, actual loaded weight, tire condition, tire pressure, and weight distribution.

Next, compare LiquidSpring with less expensive upgrades that address your specific complaint.

If a rear track bar or steering stabilizer would solve the primary problem, a complete suspension replacement might be unnecessary.

Then ask an authorized installer these questions:

  • Is my exact motorhome and chassis compatible?
  • What is the complete installed price?
  • Are wheel alignment and calibration included?
  • How long will the installation take?
  • What maintenance does the system require?
  • What warranty applies to parts and labor?
  • Where can the system be serviced while traveling?
  • Will the conversion affect chassis or RV warranties?
  • Does it change cargo-carrying capacity or vehicle weight?
  • Are replacement parts readily available?
  • Can I test-drive a similar motorhome before buying?

Finally, take that test drive if at all possible. Suspension comfort is subjective, and you need to experience the difference before deciding whether it is worth the price to you.

Frequently Asked Questions About LiquidSpring Suspension

Does LiquidSpring replace the factory suspension?

Yes, LiquidSpring is a major suspension conversion rather than a simple add-on such as a steering stabilizer or upgraded shock absorber.

The exact components replaced will depend on the chassis and system application.

Can LiquidSpring improve a rough motorhome ride?

Yes, improving ride quality is one of its main benefits. During my test drives, both the Super C and gas Class A motorhome rode noticeably better than I would normally expect from their original chassis designs.

However, results can vary with the RV, road conditions, weight, tires, and driver expectations.

Does LiquidSpring help with sway?

The system is designed to improve suspension control and can reduce excessive body movement.

Its firmer Sport setting can be helpful in crosswinds, on curving roads, and around passing trucks.

But no suspension can make a tall motorhome completely unaffected by wind.

Drivers still need to slow down or stop when conditions become unsafe.

Can the suspension setting be changed while driving?

Yes. The driver can choose among Comfort, Normal, and Sport settings using the control module near the driver’s seat.

Meanwhile, the system’s computer continues making automatic adjustments within the selected mode.

How much does LiquidSpring cost for a motorhome?

At the 2024 Hershey RV Show, I was told that an aftermarket installation could cost around $30,000.

But prices can change and vary by chassis, system, installer, and labor requirements.

Contact an authorized installer for a current written quote for your specific RV.

Is LiquidSpring available as a factory option?

It has been offered as a factory option by some motorhome manufacturers on selected models.

However, availability can change from one model year to the next.

So ask the manufacturer or dealer to confirm whether it is available on the exact motorhome you are considering.

Does LiquidSpring require maintenance?

Any advanced mechanical, hydraulic, or electronically controlled system should be inspected and maintained according to its manufacturer’s requirements.

So ask about scheduled maintenance, fluid service, diagnostic procedures, and replacement-part availability before purchasing.

And keep the system’s service documentation with the motorhome for future owners and repair facilities.

Will LiquidSpring increase my motorhome’s resale value?

It may make the motorhome more appealing to buyers who understand and want the system.

However, you should not assume that you will recover the entire installation cost when the RV is sold.

The best financial justification is usually the comfort and handling benefit you receive while you own and use the motorhome.

Should I install LiquidSpring or begin with cheaper upgrades?

In most cases, it makes sense to identify the specific handling complaint and correct any underlying problems first.

Shocks, sway bars, track bars, steering stabilizers, or helper springs may provide enough improvement for much less money.

To learn more about those less expensive option, click on the image below.

My motorhome suspension upgrades video

However, if you want a more complete transformation and intend to keep the motorhome, LiquidSpring deserves consideration.

Where can I test-drive a motorhome with LiquidSpring?

RV shows, participating dealerships, manufacturers, and LiquidSpring installers may offer demonstration vehicles or test-drive opportunities.

So contact them in advance because a suitable motorhome may not always be available.

A test drive is one of the most important steps because ride quality is something you need to experience personally.

Conclusion

LiquidSpring is one of the most impressive motorhome suspension upgrades I have experienced.

And during my test drives, it provided a noticeably smoother ride while giving me the ability to select firmer handling when road conditions called for it.

But the cost is substantial, so it is clearly not for everyone.

In fact, many motorhome owners can improve their driving experience with less expensive shocks, sway bars, steering stabilizers, track bars, or helper springs.

However, if you love your motorhome, dislike its factory ride, and plan to keep it for years, LiquidSpring could make that RV much more enjoyable to drive.

And it may also appeal to new-RV buyers who want the advantages of a gas motorhome without accepting the typical gas-chassis ride.

But before making the investment, correct any existing chassis problems, obtain a detailed installation quote, confirm compatibility, and ask about service and warranty coverage.

Most importantly, arrange a test drive. I can tell you that I was impressed, but only you can decide whether the improvement is worth the cost for your RV, travel plans, and budget.

That’s it for now. Have safe and happy travels, my friends.

How to Wash and Wax An RV the Quick, Simple, and Easy Way

This article explains how to wash and wax an RV in a quick, simple and easy way.

Because keeping an RV clean and protected can feel like an overwhelming job, especially if you own a large fifth wheel or motorhome.

There is a lot of exterior surface to cover, and the traditional wash-and-wax process can require hoses, buckets, ladders, and several hours of hard work.

So it is understandable why many RV owners keep putting the job off.

They want their RV to look good, but they may not have the time, energy, equipment, or campground permission needed to wash and wax it the old-fashioned way.

However, there is a much easier way to protect your RV exterior.

I have used a waterless RV wash and wax with an extension pole system for years, and it allows me to clean and protect my 40-foot motorhome in a little over an hour.

So in this article, I’ll explain how the system works, when you should use it, and how you can keep your RV looking great without turning exterior maintenance into an all-day project.

How to wash and wax an RV the quick, simple and easy way

Quick Answer: What Is the Easiest Way to Wash and Wax an RV?

One of the easiest ways to wash and wax an RV is to use a waterless wash-and-wax product with an extendable pole and reusable mop pads.

You apply the product with one side of the pad and then flip the pad over to dry and buff the surface.

This method eliminates the need for buckets, hoses, extensive rinsing, and repeated trips up and down a ladder.

However, a heavily soiled RV should usually be rinsed or washed first to remove mud, sand, and other abrasive debris.

Why Traditional RV Washing and Waxing Is So Difficult

Take a walk through almost any RV park or campground, and you will probably see RVs that need exterior attention.

Some are dirty, while others look dull, faded, oxidized, or weathered—even if they are not very old.

It is easy to assume the owners do not care about their RVs, but that is usually not the real problem.

Instead, many owners believe that washing and waxing an RV requires too much time and physical effort.

Traditional RV Washing Requires a Lot of Water

The traditional method usually starts with a hose, a large bucket, RV-safe soap, and a long-handled brush.

And after washing each section, you must rinse away all the soap before it dries.

The typical way to wash and wax an RV

But many RV parks and campgrounds do not allow RV washing at individual campsites.

Water conservation rules, drainage concerns, and restrictions on soap use may prevent you from washing your RV where it is parked.

And even when washing is allowed, moving a hose around a large RV can be frustrating.

The hose can become caught under tires, wrapped around steps, or dragged across surfaces you just cleaned.

Hard Water Can Leave Difficult Water Spots

Once the RV has been rinsed, the job may not be finished yet either.

Because in areas with hard water, minerals can remain on the surface after the water evaporates.

These mineral deposits leave water spots on the paint, fiberglass, glass, and trim.

And if the spots are allowed to harden, they can become surprisingly difficult to remove.

So you may need to dry the entire RV by hand before the water has a chance to evaporate.

On a 35- or 40-foot RV, that is another significant job.

Traditional Waxing Requires Even More Work

But after the RV is clean and dry, you still need to apply the wax.

And traditional RV waxing usually involves applying the product by hand and then returning to buff it off.

That can mean working your way around the RV at least twice.

And it may also require constantly moving and climbing a ladder to reach the upper sidewalls, front cap, and rear cap.

Also, if the surface is faded or oxidized, wax alone may not restore it.

So the exterior might need compounding or polishing before any protective wax or sealant is applied.

At that point, a fairly simple maintenance project has turned into an exhausting, multi-step process.

So it is not surprising that many RV owners keep postponing it.

Professional RV Detailing Can Be Expensive

Of course, you could hire a mobile RV detailing company to handle the work.

However, professional washing and waxing can cost hundreds of dollars, depending on the RV’s size, exterior condition, location, and the services requested.

Compounding, oxidation removal, polishing, roof cleaning, ceramic protection, and other services can raise the price even further.

So professional detailing may be worthwhile in certain situations, but paying for it several times each year can become expensive.

Why Your RV Exterior Needs Regular Protection

Washing an RV is not only about making it look attractive.

Regular cleaning also helps remove substances that can stain, discolor, or slowly damage the exterior.

Those substances may include road grime, insects, bird droppings, tree sap, pollen, dust, salt, and black streaks.

If they remain on the RV for long periods, they can become harder to remove.

And wax or paint sealant also creates a protective layer between the exterior and the elements.

It can help reduce the effects of sunlight, moisture, dirt, and environmental contamination.

However, no wax or sealant makes an RV exterior maintenance-free.

So the goal is to make regular cleaning easier while helping the finish retain its shine and appearance.

How a Waterless RV Wash and Wax Works

For several years, I have used a product called Wash Wax ALL from Aero Cosmetics.

It is designed to clean the exterior and leave behind a protective finish during the same process.

So instead of washing the RV, rinsing it, drying it, and then returning to apply wax, you combine several steps into one.

And that is where most of the time and labor savings come from.

You spray a small amount of the wash-and-wax solution onto the RV or application pad.

And then you spread it across the surface, flip the mop pad over, and dry or buff the area.

Just click on the image below to learn more about it.

The Wash Wax All system

There are no buckets, and under normal light-cleaning conditions, there is no rinsing.

So campground water restrictions are much less likely to be an issue, although you should still follow any campground rules regarding vehicle cleaning.

The Equipment You Will Need

The system does not require much equipment, which makes it easy to carry in an RV storage compartment.

Waterless RV Wash-and-Wax Product

The cleaning product is the heart of the system. I use Wash Wax ALL, but whichever product you choose should be approved for the specific surfaces on your RV.

Of course, read the manufacturer’s instructions before applying any cleaner, wax, or sealant.

Because RV exteriors can include full-body paint, clear coat, gelcoat, vinyl graphics, decals, plastic trim, glass, and other materials that may have different care requirements.

Extendable Cleaning Pole

The extension pole is what makes this system especially useful for large RVs.

A good pole allows you to reach most of the upper sidewalls from the ground.

Using the Wash Wax All pole system to clean an RV

The pole I use can be extended and retracted by pressing a button.

It allows me to clean the upper sections of my 40-foot motorhome without repeatedly moving a ladder around the coach.

And while avoiding unnecessary ladder use is more convenient, it can also reduce the risk of a fall.

Even so, always remain aware of overhead obstacles and never allow a cleaning pole to come near electrical lines.

Dual-Sided Mop Pads

The pole system uses mop-style pads designed for applying and removing the product.

One side distributes the wash and wax, while the clean, dry side buffs the surface.

And you may need several clean pads, especially if the RV is dusty or fairly large.

Changing dirty pads helps prevent collected grit from being moved across the finish.

Clean Microfiber Towels

Microfiber towels are helpful for smaller areas, mirrors, windows, trim, and any spots that need extra attention.

And they are also useful for removing streaks or excess product.

However, make sure the towels are clean and free of debris. A towel that has picked up sand or grit can scratch a glossy surface.

How to Wash and Wax an RV Without a Hose

The actual process is surprisingly simple, but working carefully will help you get the best results.

Step 1: Inspect the Exterior

Before you begin, walk around the RV and examine its condition.

Look for mud, sand, heavy road film, bird droppings, tree sap, loose sealant, damaged decals, and areas of oxidation.

A waterless wash is best suited for an RV with light or moderate dust and grime.

If gritty contamination is stuck to the surface, rinse or wash it away before wiping the RV.

Step 2: Work in a Suitable Location

Whenever possible, work in the shade or during a cooler part of the day.

A hot exterior can cause the product to dry too quickly and may leave streaks.

Also, avoid working in strong winds. Blowing sand and dust can settle on the surface or become trapped in your cleaning pad.

Step 3: Clean One Small Section at a Time

Do not spray the entire side of the RV at once. Instead, work in small, manageable sections so the product does not dry before you can buff it.

Start near the top and work downward. That way, any loosened dirt or product that moves down the sidewall will reach an area you have not cleaned yet.

Step 4: Apply the Wash-and-Wax Product

Apply the product according to its instructions and spread it gently with the mop pad.

You should not need heavy pressure for ordinary dust, fingerprints, or light road grime.

Of course, for stubborn insect residue or bird droppings, allow the product to soften the contamination first.

Because aggressive scrubbing could damage the finish or decals.

Step 5: Flip the Pad and Dry the Surface

Once the section has been cleaned, flip the mop head to the clean side and dry or buff the surface.

This removes loosened grime and leaves behind the protective finish.

Then move to the next section and repeat the process.

Applying the product and drying it are the two basic motions used around most of the RV.

Step 6: Change Pads When They Become Dirty

Inspect the mop pad frequently. If it has collected visible dirt, grit, or insect residue, replace it with a clean one.

Do not continue wiping the RV with a heavily soiled pad just to save time.

Because clean pads are an important part of preventing scratches and swirl marks.

Step 7: Inspect the Finish

When you finish a section, look at it from different angles. Reflected light will make streaks, missed areas, and remaining grime easier to see.

Then use a clean microfiber towel to touch up mirrors, windows, corners, and other areas that the pole system may not reach easily.

What to Do When an RV Is Extremely Dirty

A waterless RV wash is not intended to grind heavy mud, sand, or thick layers of road grime across the exterior.

So if the RV is extremely dirty, it needs an initial rinse or traditional wash.

You can take the RV to a location that permits washing or use a suitable vehicle-washing facility with enough clearance for your RV.

Always verify height and size limitations before entering any wash bay.

After rinsing, allow the RV to dry and then apply the waterless wash-and-wax product.

The initial rinse removes abrasive contamination, while the wash and wax adds shine and protection.

However, the easiest strategy is to clean the RV frequently enough that it never becomes extremely dirty.

And maintenance cleaning is much faster than trying to restore a neglected exterior.

Can Waterless Washing Damage RV Paint?

When I first began discussing this system, some RV owners—especially owners of Class A motorhomes—insisted that waterless washing would ruin the paint.

Well, after years of using it on my own motorhome, that has not been my experience.

In fact, my motorhome’s paint has remained in excellent condition.

Regular cleaning has prevented dirt and environmental contamination from accumulating, while the protective finish has helped preserve its appearance.

But technique matters. You should not wipe gritty dirt across any painted or glossy surface, regardless of what cleaning product you use.

The RV manufacturer’s care instructions also take priority.

If you are unsure whether a product is safe for full-body paint, gelcoat, clear coat, decals, or protective coatings, test it in a small, inconspicuous area first.

Adding Ceramic Paint Protection

A wash-and-wax product makes routine maintenance easier, but you may want to add a longer-lasting paint sealant for additional protection.

In the past, I used and recommended Meguiar’s Fast Finish. It was easy to apply and produced a very good shine.

Just click on the image below to learn more about it.

Meguiar's Fast Finish paint protection

However, detailing products continue to improve, and I now use a Cerakote ceramic paint sealant.

In my experience, it is easy to apply, produces an excellent shine, and lasts longer than many traditional spray protectants I have used.

Just click on the image below to learn more about it.

Cerakote RV paint protection

Wash-and-Wax Products and Sealants Have Different Jobs

A waterless wash-and-wax product is ideal for frequent maintenance. It removes light dirt while renewing a basic layer of protection.

A ceramic sealant is generally used less often and is intended to provide more durable protection.

So the wash and wax maintains the RV between sealant applications.

Of course, before using a ceramic product, make sure you have selected one intended for your RV’s exterior surface.

Then follow the product directions regarding preparation, application temperature, curing time, and compatibility with existing coatings.

Sealants Cannot Repair Oxidation

It is important to understand that paint sealants and waxes protect the surface underneath them.

They do not repair severely oxidized paint or gelcoat.

So if your RV is already faded, chalky, or heavily oxidized, it may need professional compounding and polishing first.

Then once the finish has been restored, regular washing and protection can help keep it from deteriorating as quickly.

Tips for Better Results

Consistency is more important than waiting until the RV looks terrible.

A quick cleaning every few weeks or after a long travel day is far easier than restoring a neglected exterior.

Keep these additional tips in mind:

  • Read the RV manufacturer’s exterior-care instructions.
  • Test unfamiliar products in a small, hidden area.
  • Avoid cleaning a hot RV in direct sunlight.
  • Use clean mop pads and microfiber towels.
  • Rinse away sand, mud, and heavy grit before wiping.
  • Clean bird droppings and insect residue promptly.
  • Do not aggressively scrub vinyl graphics or decals.
  • Keep the extension pole away from overhead power lines.
  • Follow campground and RV park cleaning rules.
  • Apply ceramic sealants only to compatible surfaces.
  • Avoid applying wax or sealant over damaged or failing clear coat.
  • Do not forget the front and rear caps, where fading often appears first.

And finally, inspect roof seams, windows, compartment doors, and sealant while working around the RV.

Cleaning provides a perfect opportunity to spot developing exterior problems before they become expensive repairs.

Frequently Asked Questions About Washing and Waxing an RV

How often should I wash and wax my RV?

The right schedule depends on how often the RV is used, where it is stored, and the climate.

An RV exposed to intense sun, salt air, trees, insects, or frequent travel may need cleaning more often.

So a maintenance wash can be performed whenever the RV begins to collect light dirt.

More durable waxes and sealants should be reapplied according to their instructions and based on how well water beads and the surface retains its gloss.

Can I use a waterless wash on a very dirty RV?

Not without removing heavy mud, sand, and grit first. Wiping abrasive debris across the surface could create scratches.

Rinse or traditionally wash a heavily soiled RV, allow it to dry, and then use the waterless wash and wax for final cleaning and protection.

Can I use ordinary dish soap to wash my RV?

Dish soap is generally not the best choice for routine RV washing. It may remove or weaken existing wax and protective products.

Instead, use a cleaner designed for automotive or RV exteriors and verify that it is compatible with your RV’s paint, gelcoat, clear coat, graphics, and decals.

Will a waterless wash remove black streaks?

It may remove light, fresh streaks, but older black streaks could require a dedicated RV-safe cleaner.

Test any stronger cleaner first because some products can affect wax, decals, or the surrounding finish.

It is also wise to clean the RV roof periodically because dirt running off the roof often contributes to black streaks on the sidewalls.

Do I still need to wax the RV if the product includes wax?

A wash-and-wax product can provide convenient maintenance protection.

However, many RV owners also apply a longer-lasting wax, polymer sealant, or ceramic sealant periodically.

The combination allows the sealant to provide longer-term protection while the wash and wax handles regular cleaning.

Can I use the same product on RV windows?

Some waterless wash products can be used on glass, but you should follow the specific product instructions.

But you may prefer a dedicated glass cleaner if the product leaves haze or streaks.

Be particularly careful with acrylic or polycarbonate windows because they can require special cleaners.

Is a ceramic sealant the same as a professional ceramic coating?

No. Consumer spray ceramic sealants are generally easier to apply but usually do not provide the same durability as a professionally prepared and installed ceramic coating.

However, a spray ceramic sealant can still be a practical option for RV owners who want better protection without the cost and preparation involved in a professional coating.

Can this method remove heavy oxidation?

No. Heavy oxidation normally requires surface correction using specialized compounds, polishes, tools, and techniques.

And because it is possible to damage paint, gelcoat, decals, or clear coat during aggressive correction, badly oxidized RVs may be best handled by an experienced RV detailer.

How long does it take to wash and wax a large RV this way?

Once you are familiar with the process, a lightly soiled RV can be cleaned surprisingly quickly.

In fact, I can usually complete my 40-foot motorhome in a little over an hour.

Of course, the exact time depends on the RV’s size, condition, exterior design, and the number of areas that require extra attention.

Conclusion

Washing and waxing an RV does not have to involve an entire day of hauling buckets, untangling hoses, climbing ladders, and buffing wax by hand.

With a waterless RV wash and wax, an extension pole, and clean mop pads, routine exterior care can become a much more manageable job.

But remember that a waterless system works best for regular maintenance.

If the RV is covered in mud, sand, or heavy road grime, remove that abrasive material before wiping the surface.

I have used this basic system on my motorhome for years, and the finish has remained in excellent condition.

So if the difficulty of traditional washing and waxing has caused you to postpone RV exterior maintenance, this approach may be worth considering.

The easier the process becomes, the more likely you are to do it regularly.

And regular cleaning and protection can help your RV look better, remain easier to maintain, and retain its appearance for years to come.

That’s it for now. Have safe and happy travels, my friends.