This article is all about RV safety. And the top five dangers of full-time RV travel and camping.
Now of course, there’s lots of YouTube channels out there that make full-time RVing seem like one big, long, fun vacation.
And nothing but happy times as you go from one beautiful spot in the country to another.
And it’s true that lots of fun can be had as a full-time RVer. But there are also real dangers that you need to know about.
So this video is going to cover what I consider to be the top five dangers of full-time RV living.
Table of Contents
- RV Safety – Be Prepared For Danger #1
- RV Danger #2 Can Be A Killer
- A Very Important RV Safety Device To Have On Hand
- RV Danger #3 Can Happen On The Highway
- RV Safety – Be Ready For A Silent, Odorless Killer
- RV Danger #4 Happens A Lot In RV Campgrounds
- Conclusion
RV Safety – Be Prepared For Danger #1
And number one on the list is bad weather. It’s something that can affect you no matter where you are, and whether you’re in an RV or not.

But RVs are particularly susceptible to certain kinds of bad weather. Take for instance, high winds while you’re traveling down the road.
And if you think about it, an RV is one big wall on its side that becomes like a billboard for wind.
So if you have a strong wind coming from the side, it can start moving you around on the road.
And I’ve experienced that on several occasions in our travels. Let me tell you, that is no fun for the RV driver!
So my recommendation is that if you start to get into high winds, slow down right away.
In fact, maybe even stop if it gets bad enough. And just wait for the winds to die down before going further.
Now another situation that can be problematic is if you park your RV among trees, like at a campground, and a big storm comes up.
I’ve seen tree limbs come off in a heavy storm and go all the way through an RV.
And I have also seen big limbs come down and destroy a vehicle owned by an RVer.


So my recommendation is this. Get very familiar with online weather websites and channels.
And consult them regularly if you are a full-time RVer. That way you can know what’s coming up in advance and be ready for it.
Being prepared for bad weather is your best defense against the damage that storms can do.
RV Danger #2 Can Be A Killer
OK, number two on the full-time danger list is fire. And of course, RVs are made with materials that often burn very easily.
So because they can burn really fast, you need to be more fire conscious than what is considered normal.

And that means that you need to try to prevent as many fires as you can.
So keep your RV’s propane system in good order. Make sure there are no leaks by checking it regularly.
And I also highly recommend a safety device called “Gas Stop”. It’s a simple product that attaches to your LP tank.


Then if there’s a sudden loss of pressure in the LP line, it just shuts off the flow of propane. And that’s a great peace of mind to have!
Also, it seems that lots of fires have begun around RV fridges in the past too. So keep them serviced well!
And make sure the outside access area for your RV’s fridge is kept clean too. That way there’s less to catch fire easily in that compartment.
Also, if you have a blown fuse, be sure that you replace it with the right fuse for that circuit.
Because if you don’t, you can start an electrical fire by overloading your RV’s wiring. So be careful about that!
A Very Important RV Safety Device To Have On Hand
Also, fire extinguishers are a very good safety device to have on hand at all times.
So first of all, always make sure they are up-to-date and have not aged out of service.
And if you have a long RV, have more than one. In fact, have as many as you would like in your RV.
That way there will always be one handy to you no matter where you are in the RV.
Another RV safety tip is to have an up-to-date LP detector that actually works.

Now RV inspectors often find that many LP detectors in RVs are out of date. Or that they are not functioning correctly.
So make it a habit to check your RV’s LP detector regularly, and then verify that it’s working properly.
RV Danger #3 Can Happen On The Highway
OK, third on the RV dangers list for this article is road accidents.
And an accident in an RV can cause a lot of damage. Or in some cases it can even totally destroy your RV.

But more than that, it can cause injury and even death. That’s because it’s easy to lose control of an RV in some situations encountered on the road.
For instance, what about the situation I mentioned where winds can come up and start moving an RV around on the road?
Well, there’s lots of videos on YouTube that show that kind of thing happening to an RVer.
And you can actually see where the driver just loses control of the RV. And that often results in a big crash.
But motorhomes can also have other issues too. They can have tire blowouts while traveling down the highway.
And it can be very dangerous when the blowout happens on the front end to a steering tire.
With such a major and sudden loss of tire pressure it’s easy to lose control of the RV. Especially if you don’t know what to do in that situation.
So here’s my recommendations to help be prepared in advance to keep things safe on the road.
How To Be Prepared In Advance
First of all, be sure to travel at a safe speed. And that means keeping plenty of room between you and the vehicle in front of you.
So if anything happens, you’ve got room to be able to handle the situation safely.
But I also recommend getting a steering stabilizer bar for your motorhome too.
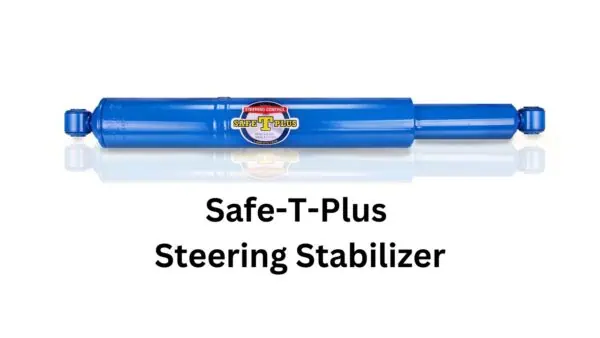
Now it won’t resolve all the issues with steering during a tire blowout. But they are a big help in these kinds of emergency situations.
Also, it’s good to know how to handle a sudden tire blowout on the highway too.
Because there’s ways of dealing with it that can keep you safe. And I made a video about that very subject.
Just click on the image below to watch that video on what to do during a motorhome tire blowout.

Here’s Some RV Gear That Can Keep you Safe
Something else I think you need is to have a tire pressure monitoring system for your RV.
And that way you can monitor the tire pressure changes that are happening as you travel down the highway.
But it will also tell you the temperature in your RV tires as well. And very often, tires are sending you a message before they actually fail.
So having a good tire pressure monitoring system is a good way to be prepared. And it can help you avoid a tire blowout altogether.
Just click on the image below to see the TPMS that we use in our motorhome.

OK, my final recommendation on this subject is not to go over the weight limits for your RV. Or for your tow vehicle either.
Of course, this is a very common mistake that a lot of people make with their RV.
But you will keep things under a lot better control if your RV’s weight limit is not exceeded. And the same applies for your towed vehicle too.
RV Safety – Be Ready For A Silent, Odorless Killer
Now let’s move on to number four on this article’s dangers list. And that’s the possibility of carbon monoxide poisoning in an RV.
Carbon monoxide is a silent, odorless killer that’s often caused by burning fuels.
And since RVs have a small living space in them, it becomes problematic very easily.
Because we burn fuels in our stove, and in our furnace and generator.
In fact, if it’s a motorhome even the engine’s exhaust system can produce carbon monoxide.

So because of all of that, it’s important to have an installed CO detector in your RV.

But once again, make sure that the one you have works like it should. And that it’s capable of warning you in a dangerous situation.
Also, inspect your motorhome exhaust system regularly. And if there are holes developing there, then get it repaired or replaced right away.
Finally, make sure that any generator exhaust is not coming into your living area where you are. This is a really important thing to do!
RV Danger #4 Happens A Lot In RV Campgrounds
OK, next on the danger list of full-time RVing is theft. There’s lots of RVs and RV equipment that are stolen every single year.
So when you’re away from the RV for any reason, be sure to use the lock on your RV door.

Especially if you have expensive equipment that you take along with you as you travel.
You can use it when you need to, but store it back away and lock it after you’re done.
Because you don’t want that kind of equipment sitting out where people can see it. And where thieves get an idea to steal it at night.
Additionally, it’s a good practice to have some lights at night outside your RV too.
In fact, we like to use string lights that go all the way around the perimeter of our RV. Click on the image below to see some.

Because thieves don’t like lights. They would prefer to do what they do in the absolute dark.
Also, if you have items like a water softener or a portable generator, then chain them to something permanent and lock them down.
Now that doesn’t mean that they can’t be stolen if someone really wants them. But it makes the job much more difficult to do.
And finally, use a hitch lock if you have a travel trailer or a fifth wheel towable.
Because that way they can’t just back up, hitch to your RV, and take off with it. Which happens a lot more often than you might think.
Conclusion
OK, those are some of my best RV safety tips. And the top five dangers of full-time RV living that I wanted to share with you.
Now I’m not trying to scare anyone away from full-time RVing. Because we have thoroughly enjoyed our full-time travels over the years.
But you also need to be realistic. And it’s a good idea to be prepared for the challenges that full-timers often face out on the road.
So hopefully the list in this article is a good starting point to help you not only enjoy your RV travels, but be ready for possible dangers as well.
Have safe and happy RV travels!